這裡就照著 DHH 的影片教學步驟,重現這個 Demo。 趕時間的人,可以直接複製程式碼 & 指令,去執行。
建立一個專案
$ rails new rails7_demo
$ rails g scaffold post title:string content:text
- 建立 Rails 7 專案 ; 並且建立 post 基本 CRUD
- 可以打開這些自動產生出來的檔案看看
- db/migrate/20220211022659_create_posts.rb
- app/models/post.rb
- app/controllers/posts_controller.rb
- app/views/posts/*
- app/views/layouts/application.html.erb
- 跟 Rails 6不同(webpacker v.s. importmap-rails)的地方
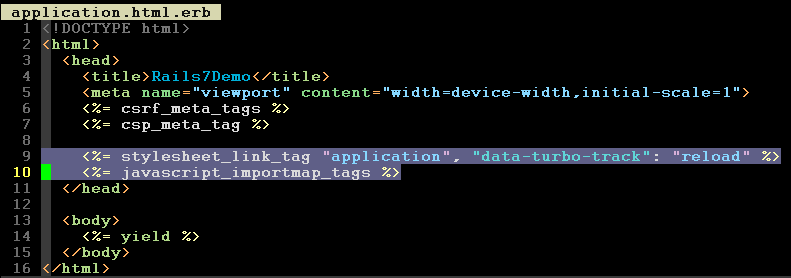
- app/views/posts/show.html.erb
- 跟 Rails 6不同(link_to method: :method vs button_to method: :method)的地方

## 如果是使用 MySql, PostgreSQL, MariaDB... (Default: sqlite)
## $ rails db:create

$ rails db:migrate
- 建立 post 資料表 到資料庫,並產生schema檔
- db/schema.rb
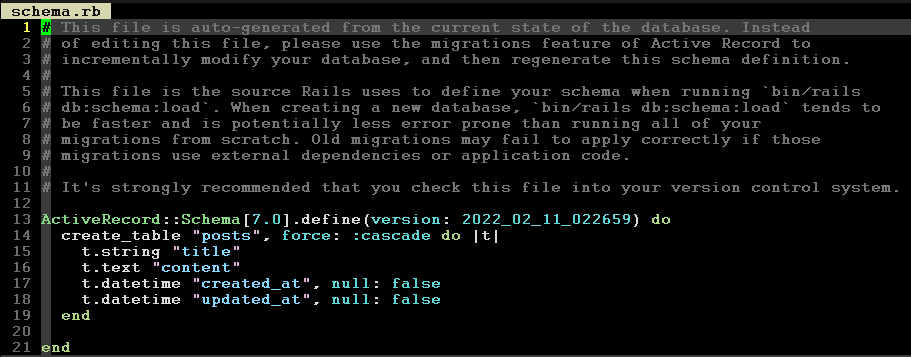
- db/schema.rb
$ rails server
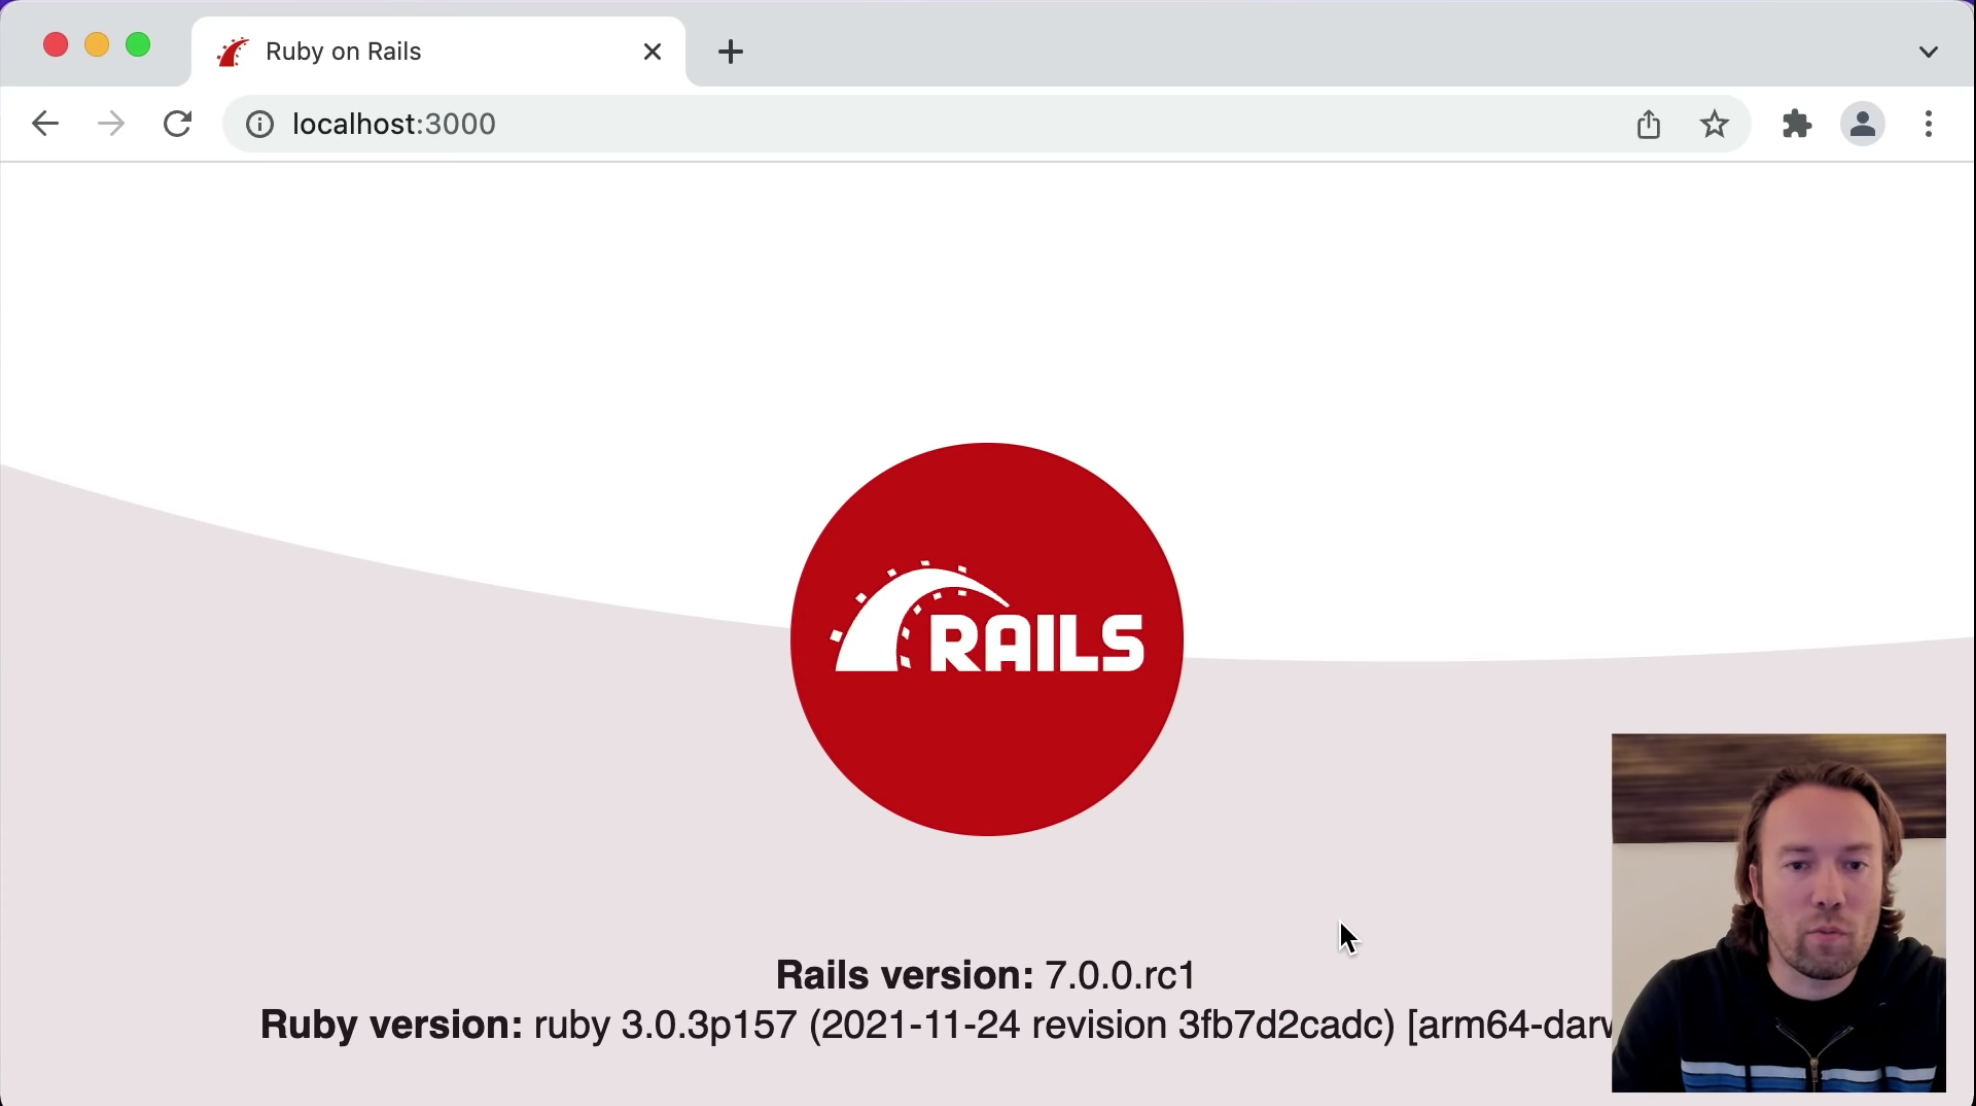
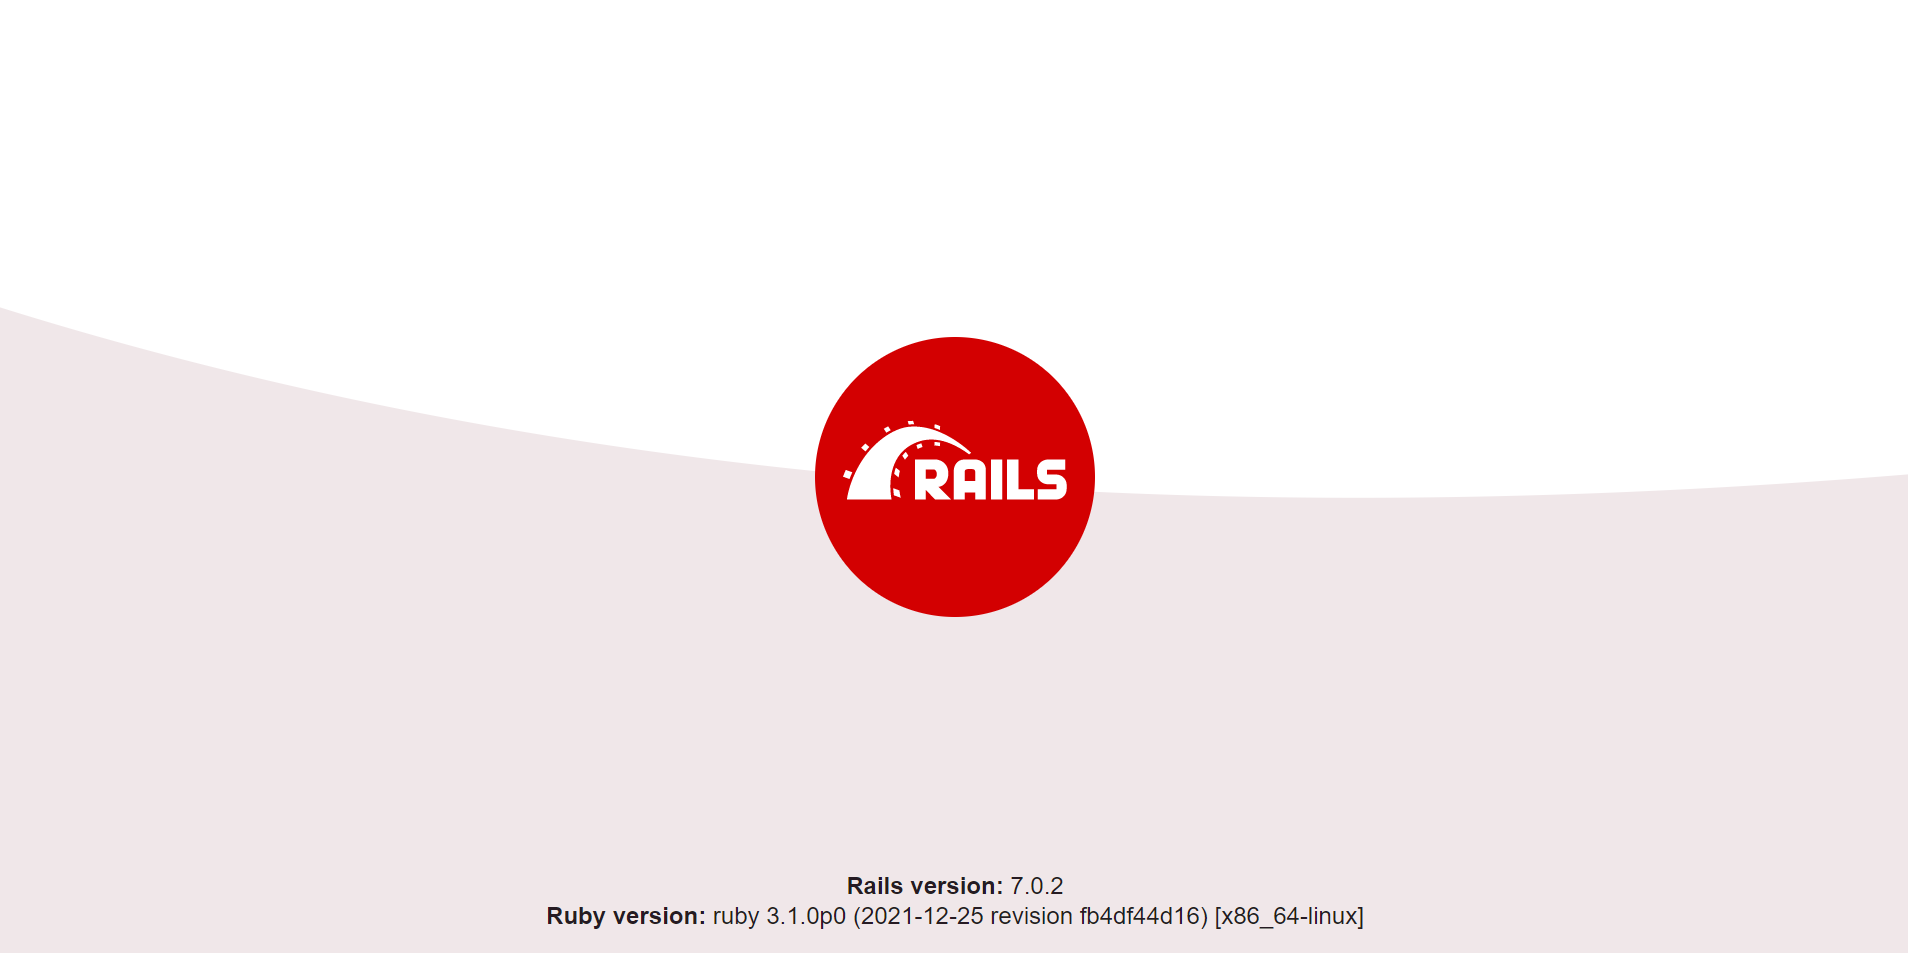
- 執行 rails server,瀏覽器看看
  <!DOCTYPE html>
  <html>
    <head>
      <title>Rails7Demo</title>
      <meta name="viewport" content="width=device-width,initial-scale=1">
      <%= csrf_meta_tags %>
      <%= csp_meta_tag %>

      <%= stylesheet_link_tag "application", "data-turbo-track": "reload" %>
+      <link rel="stylesheet" href="https://cdn.simplecss.org/simple.min.css">
      <%= javascript_importmap_tags %>
    </head>

    <body>
      <%= yield %>
    </body>
  </html>
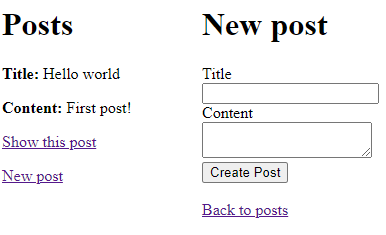
- 美化一下畫面
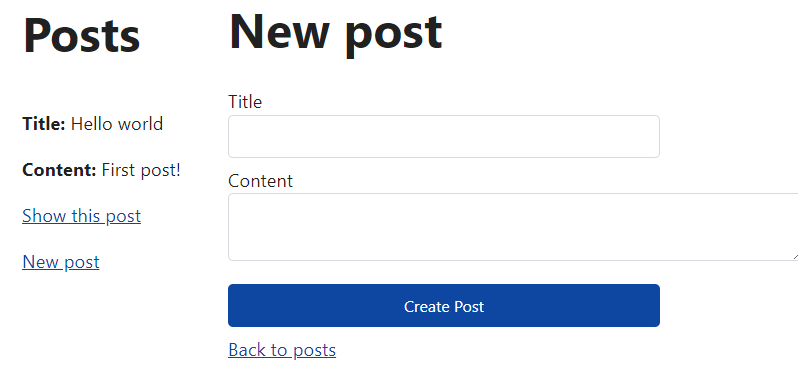
加入欄位條件限制 validation
# app/models/post.rb
  class Post < ApplicationRecord
+    validates_presence_of :title
  end
http://localhost:3000/posts/new (試試看 title 不要打內容)
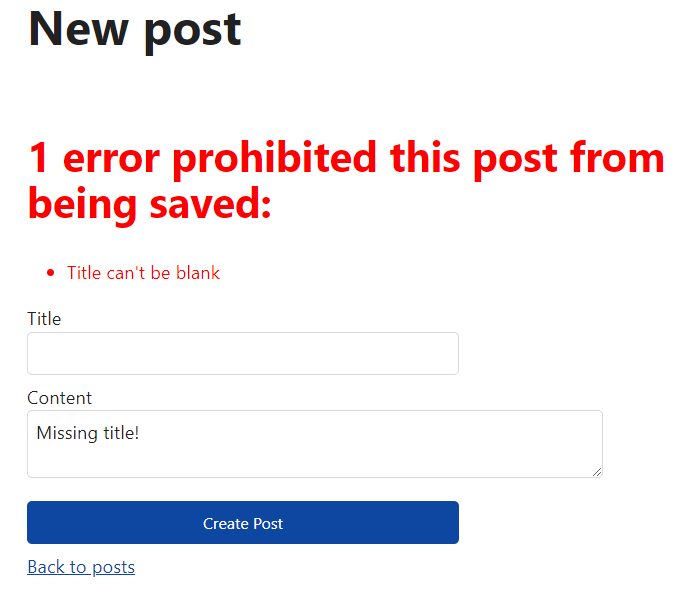
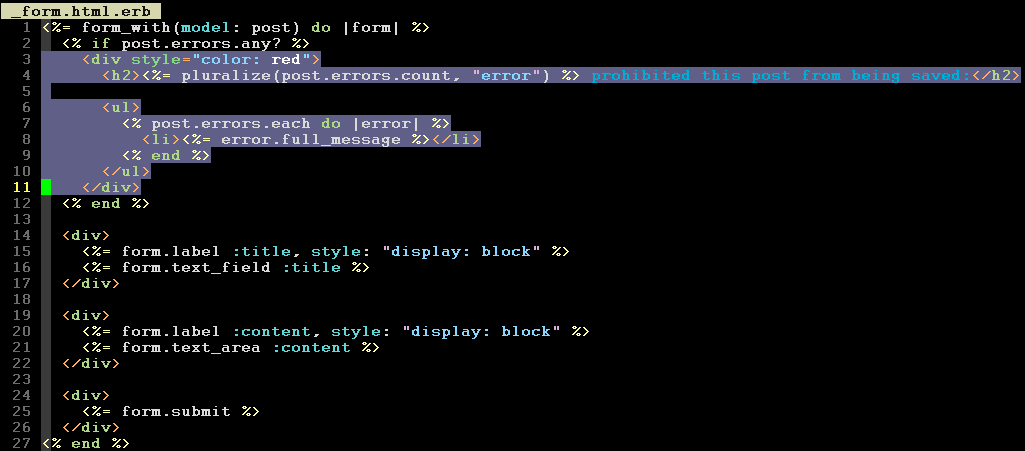
這個錯誤來自 app/views/posts/_form.html.erb
Rails Console
$ rails console
> Post.first
> Post.create! title: "From the console",  content: "Nice!"
> Post.all
> Post.where(create_at: Time.now.all_day)
> Post.where(create_at: Time.now.all_day).to_sql
> Post.where(create_at: Time.now.yesterday).to_sql
> Post.where(create_at: Time.now.yesterday)
- Rails Consol 也可以跟網頁一樣新增資料
- 如果是使用 Ruby 3 還會有自動補全的效果

Action Text
$ rails action_text:install
$ bundle
$ rails db:migrate
- 這裡會幫你把 Action Text 需要的設定新增進來
- javascript
-
css

- db/migration 資料表
- gem "image_processing"
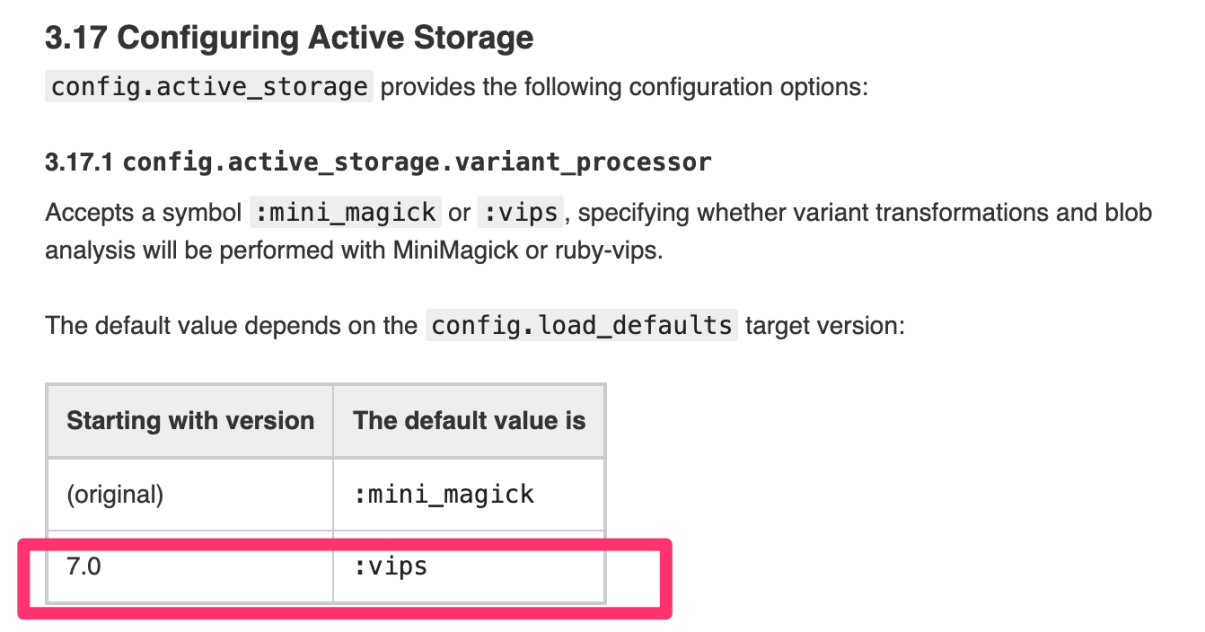
- Rails 7 預設使用 vips 處理圖片, Rails 6 預設使用 ImageMagick
-
https://edgeguides.rubyonrails.org/configuring.html#configuring-active-storage
# app/models/post.rb
  class Post < ApplicationRecord
    validates_presence_of :title
+    has_rich_text :content
  end
# app/views/posts/_form.html.erb

  <%= form_with(model: post) do |form| %>
    <% if post.errors.any? %>
      <div style="color: red">
        <h2><%= pluralize(post.errors.count, "error") %> prohibited this post from being saved:</h2>

        <ul>
          <% post.errors.each do |error| %>
            <li><%= error.full_message %></li>
          <% end %>
        </ul>
      </div>
    <% end %>

    <div>
      <%= form.label :title, style: "display: block" %>
      <%= form.text_field :title %>
    </div>

    <div>
      <%= form.label :content, style: "display: block" %>
-      <%= form.text_area :content %>
+      <%= form.rich_text_area :content %>
    </div>

    <div>
      <%= form.submit %>
    </div>
  <% end %>
-
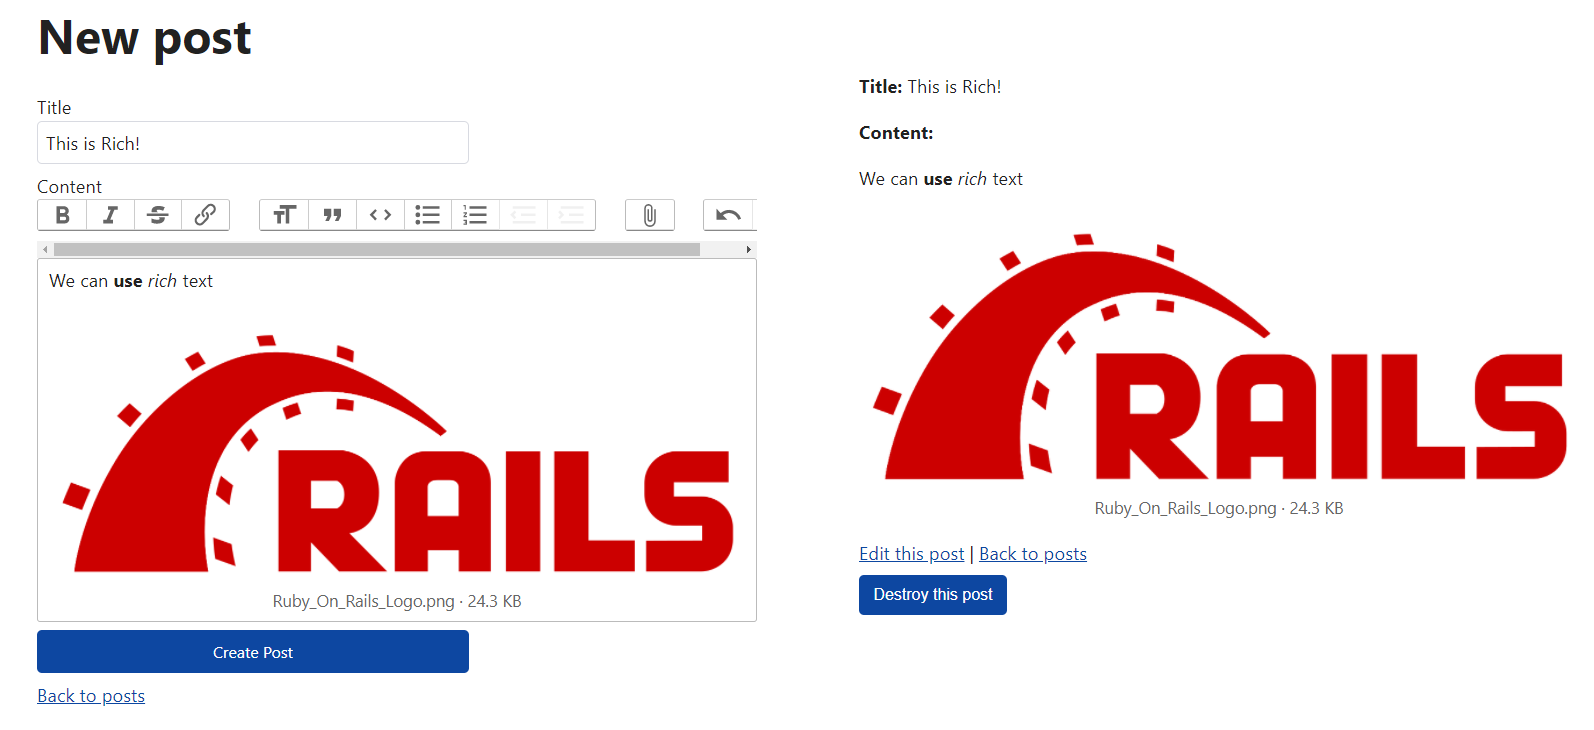
設定好就可以瀏覽器,試試Action Text編輯器了(甚至可以拖拉圖片上傳)
-
加裝了甚麼這麼神奇
-
app/javascript/application.js

-
config/importmap.rb

-
app/javascript/application.js
-
如果有遇到無法顯示圖片問題,就是沒安裝到vips套件
-
https://github.com/rails/rails/issues/43976#issuecomment-1024631878
Solution 1 (change back to use
ImageMagicklike what<= Rails 6did)-
config/application.rb
  config.load_defaults 7.0
+ config.active_storage.variant_processor = :mini_magick
Solution 2 (Install
libvips v8.6+)Install via OS package manager
-
Ubuntu
apt install -y libvips -
CentOS
dnf install -y https://rpms.remirepo.net/enterprise/remi-release-8.rpm
dnf install -y vips vips-tools
Install by compiling
libvipsyourself -
-
importmap-rails
importmap-rails (CDN)
$ bin/importmap pin local-time
- 使用 bin/importmap 加裝一個 javascript 套件 local-time
-
Default 會自動幫你設定 CDN 路徑 進去 config/importmap.rb

-
Default 會自動幫你設定 CDN 路徑 進去 config/importmap.rb
// app/javascript/application.js
// Configure your import map in config/importmap.rb. Read more: https://github.com/rails/importmap-rails
import "@hotwired/turbo-rails"
import "controllers"
import "trix"
import "@rails/actiontext"
+ import LocalTime from "local-time"
+ LocalTime.start()
- bin/importmap 加裝 javascript 套件 local-time,並且 import local-time 套件才可以使用。
# app/views/posts/_post.html.erb

  <div id="<%= dom_id post %>">
    <p>
      <strong>Title:</strong>
      <%= post.title %>
    </p>
+     <p>
+       Posted: <%= time_tag post.created_at, "data-local": "time-ago" %>
+     </p>

    <p>
      <strong>Content:</strong>
      <%= post.content %>
    </p>

  </div>
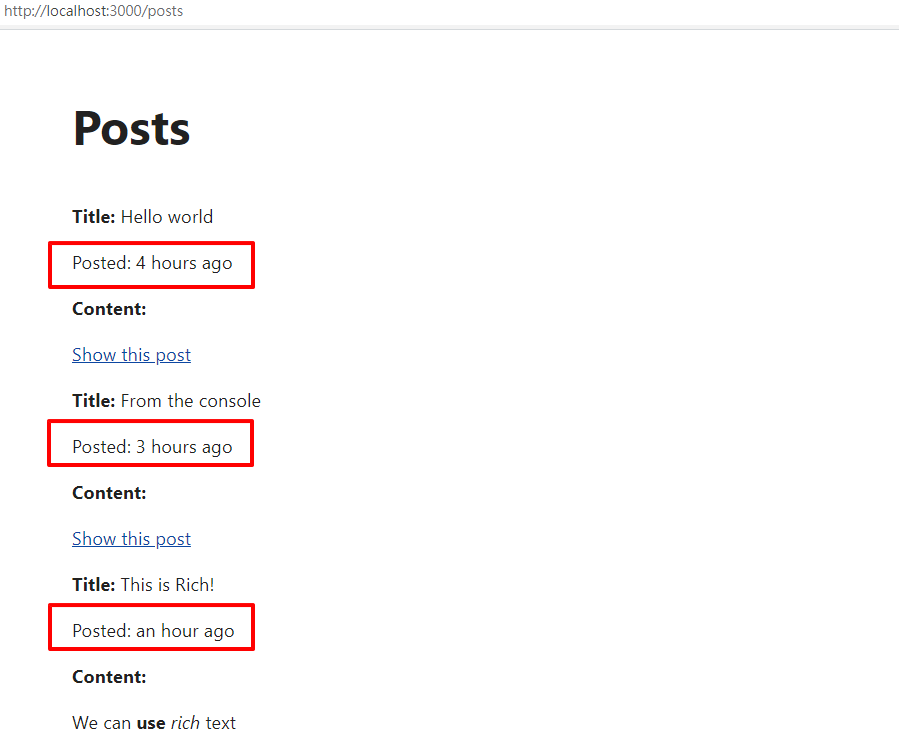
- 在 views 裡面設定好 local-time 語法
importmap-rails (local)
$ bin/importmap pin local-time --download
- 使用 bin/importmap 下載 local-time 到本機,不使用 CDN
- Default 下載到 vendor/javascript/local-time.js

- 並且修改 config/importmap.rb

增加 comments
$ rails g resource comment post:references content:text
$ rails db:migrate

$ rails c
> Post.first
> Post.first.comments # 失敗,還沒有設定 comments 這個 method
- 因為還沒有寫好 Web UI 先用 rails console 做測試
# app/models/post.rb
class Post < ApplicationRecord
  validates_presence_of :title
  has_rich_text :content
+  has_many :comments
end
# 重開 Rails Console
# 如果 Rails Console 還沒關掉,可以不用關掉重開,直接 Reload!,比較省時間
> reload!
> Post.first.comments # 成功,但是沒資料
> Post.first.comments.create! content: "First comment!"
製作 Web UI for comments
# app/views/posts/show.html.erb

  <p style="color: green"><%= notice %></p>

  <%= render @post %>
+   <%= render "posts/comments", post: @post %>

  <div>
    <%= link_to "Edit this post", edit_post_path(@post) %> |
    <%= link_to "Back to posts", posts_path %>

    <%= button_to "Destroy this post", @post, method: :delete %>
  </div>
# app/views/posts/_comments.html.erb
<h2>Comments</h2>

<div id="comments">
  <%# Expands to render partial: "comments/comment", collection: post.comments %>
  <%= render post.comments %>
</div>

<%= render "comments/new", post: post %>
# app/views/comments/_comment.html.erb
<div id="<%= dom_id(comment) %>">
  <%= comment.content %>
  - <%= time_tag comment.created_at, "data-local": "time-ago" %>
</div>
# app/views/comments/_new.html.erb
<%= form_with model: [ post, Comment.new ] do |form| %>
  Your comment: <br>
  <%= form.text_area :content, size: "20x5" %>
  <%= form.submit %>
<% end %>
# app/views/posts/_post.html.erb

  <div id="<%= dom_id post %>">
    <p>
      <strong>Title:</strong>
      <%= post.title %>
    </p>

    <p>
      Posted: <%= time_tag post.created_at, "data-local": "time-ago" %>
    </p>
+    <p>
+      <strong><%= pluralize post.comments.count, "Comment" %></strong>
+    </p>

    <p>
      <strong>Content:</strong>
      <%= post.content %>
    </p>

  </div>
# app/controllers/comments_controller.rb
class CommentsController < ApplicationController
  before_action :set_post

  def create
    @post.comments.create! params.required(:comment).permit(:content)
    redirect_to @post
  end

  private
  def set_post
    @post = Post.find(params[:post_id])
  end
end
# config/routes.rb
Rails.application.routes.draw do
  resources :posts do
    resources :comments
  end

  # Defines the root path route ("/")
  # root "articles#index"
end
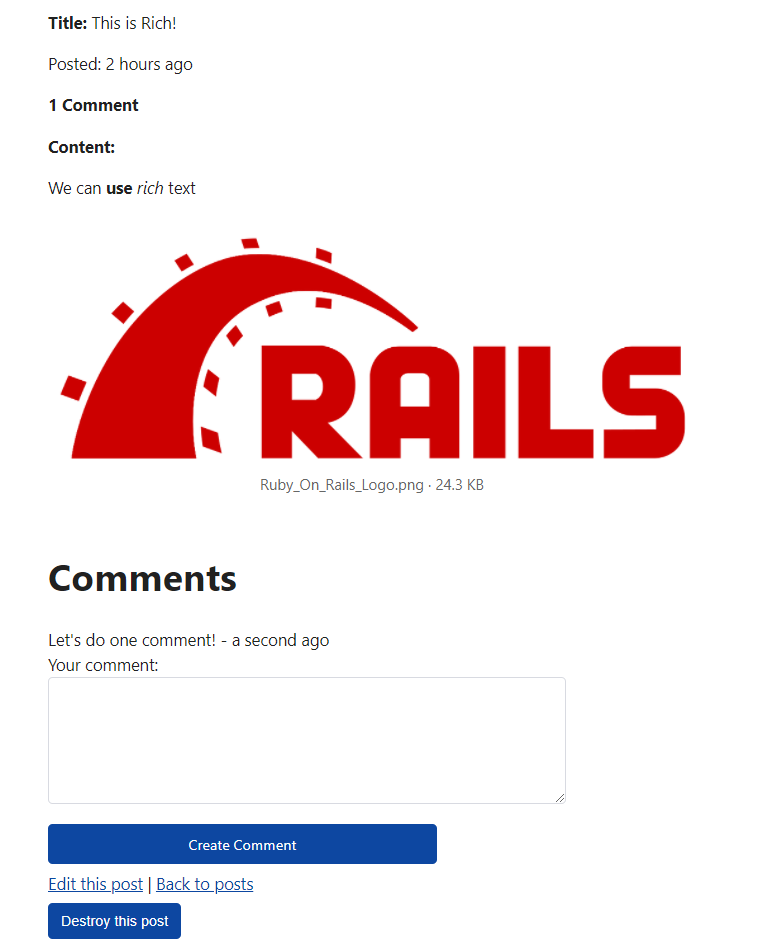
- 上面語法,都打好,就可以開網頁看看是不是成功加入 comments 了
- 幫你計算 comments 的數量
- WebUI 可以新增 comment
- http://localhost:3000/posts
Action Mailer
$ rails g mailer comments submitted
- 建立 mailer 相關檔案
# app/helpers/comments_helper.rb

class CommentsMailer < ApplicationMailer

  # Subject can be set in your I18n file at config/locales/en.yml
  # with the following lookup:
  #
  #   en.comments_mailer.submitted.subject
  #
  def submitted(comment)
    # @greeting = "Hi"
    @comment = comment

    # mail to: "to@example.org"
    mail to: "blog-owner@example.org", subject: "New comment !"
  end
end
- 設定 E-mail 收件人、主旨
# app/views/comments_mailer/submitted.html.erb
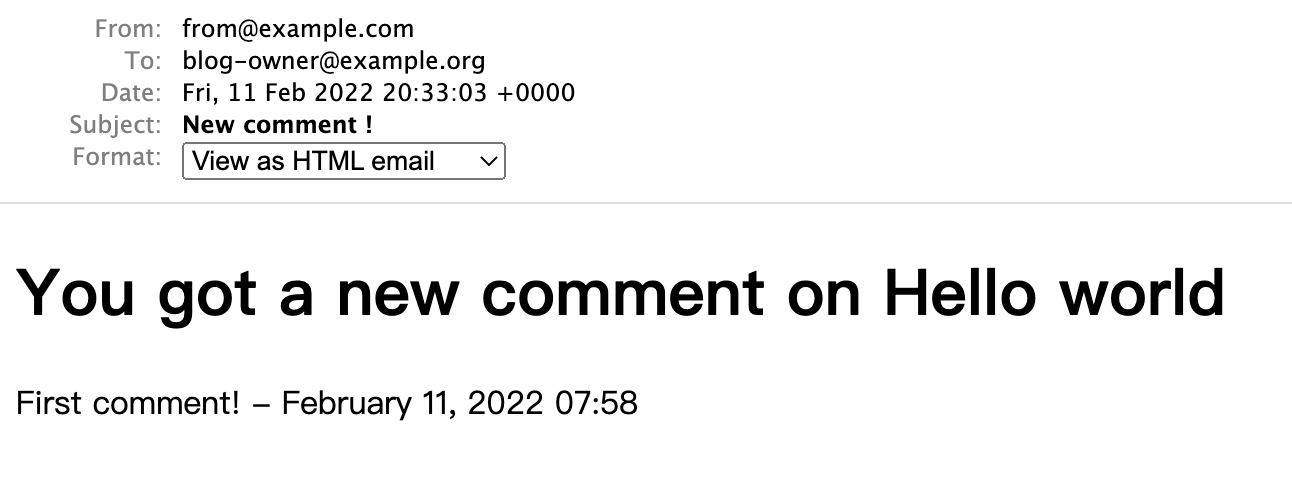
<h1>You got a new comment on <%= @comment.post.title %></h1>
<%= render @comment %>
- 設定,E-mail 內容 (html)
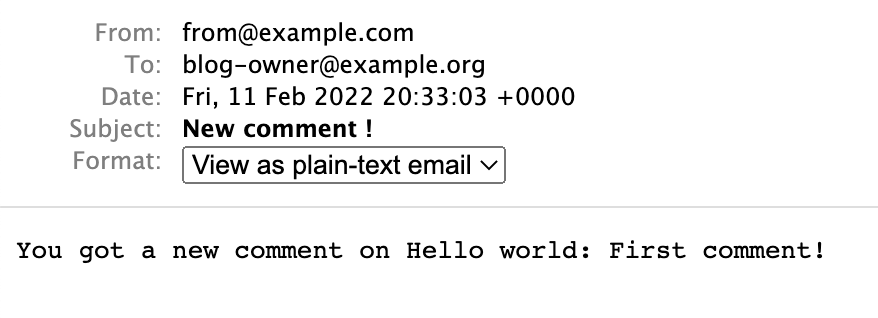
# * 設定,E-mail 內容 (html)
You got a new comment on <%= @comment.post.title %>: <%= @comment.content %>
- 設定,E-mail 內容 (text)
# test/mailers/previews/comments_mailer_preview.rb

# Preview all emails at http://localhost:3000/rails/mailers/comments_mailer
class CommentsMailerPreview < ActionMailer::Preview

  # Preview this email at http://localhost:3000/rails/mailers/comments_mailer/submitted
  def submitted
-    CommentsMailer.submitted
+    CommentsMailer.submitted Comment.first
  end

end
- 從 Rails 7 的 test 提供的 mailer preview 先看看,email 會長怎麼樣子
# app/controllers/comments_controller.rb

class CommentsController < ApplicationController
  before_action :set_post

  def create
-     @post.comments.create! params.required(:comment).permit(:content)
+    comment = @post.comments.create! params.required(:comment).permit(:content)
+    CommentsMailer.submitted(comment).deliver_later
    redirect_to @post
  end

  private
  def set_post
    @post = Post.find(params[:post_id])
  end
end
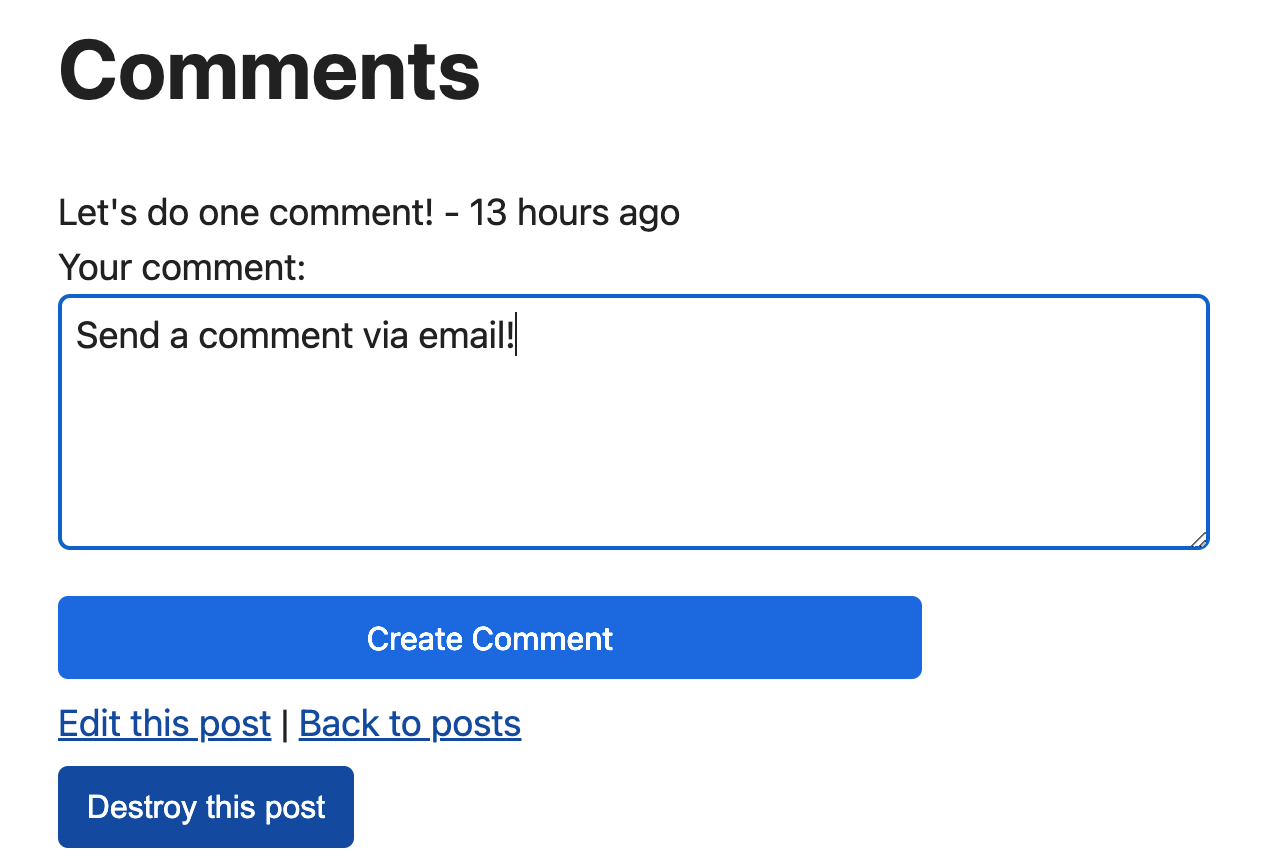
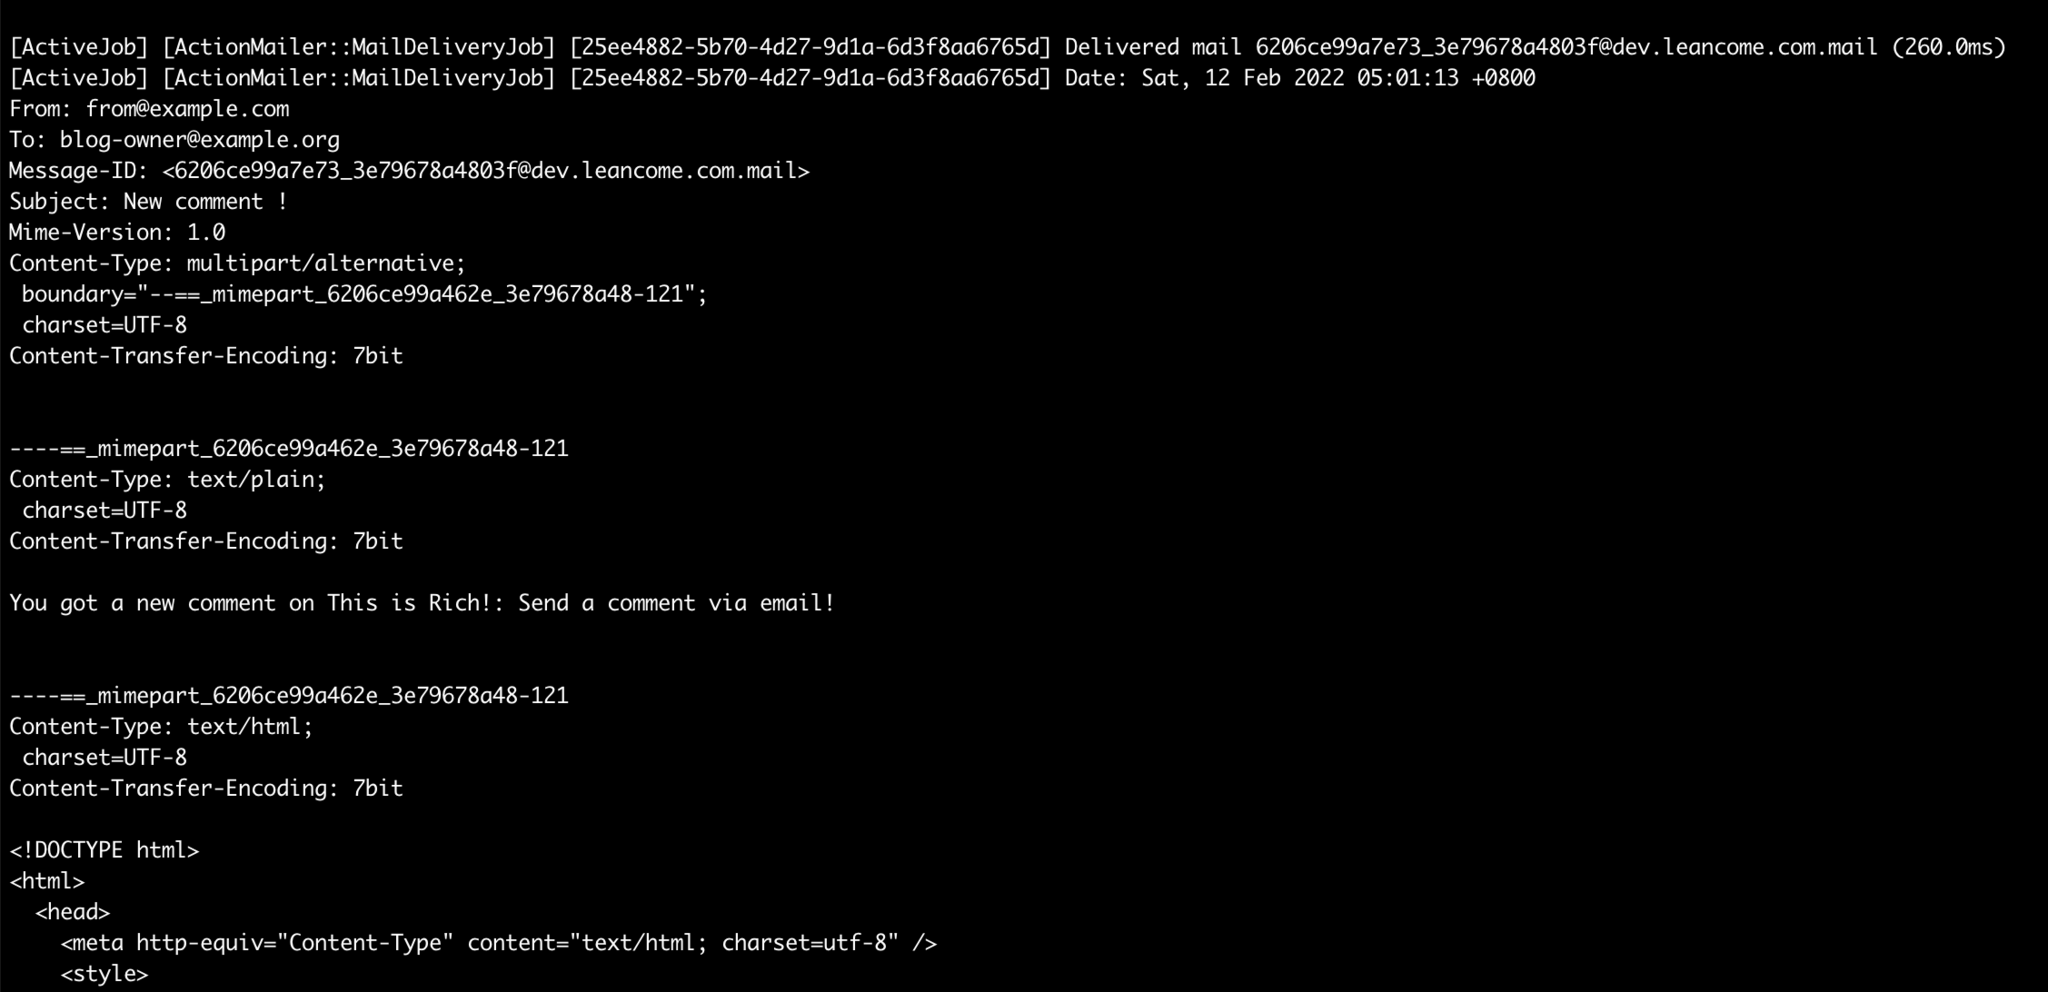
- mailer previewer 確定格式內容沒問題,就可以實作進去 controller,讓 comment 發生的同時真的發信。
- http://localhost:3000/posts/3
# 如果是在可以寄信的 Server 上開發,修改這個設定可以讓信件真的發出去
# config/environments/development.rb
config.action_mailer.delivery_method = :sendmail
如果是在可以發信的 server 主機開發,這個信是會直接寄出去的!
-
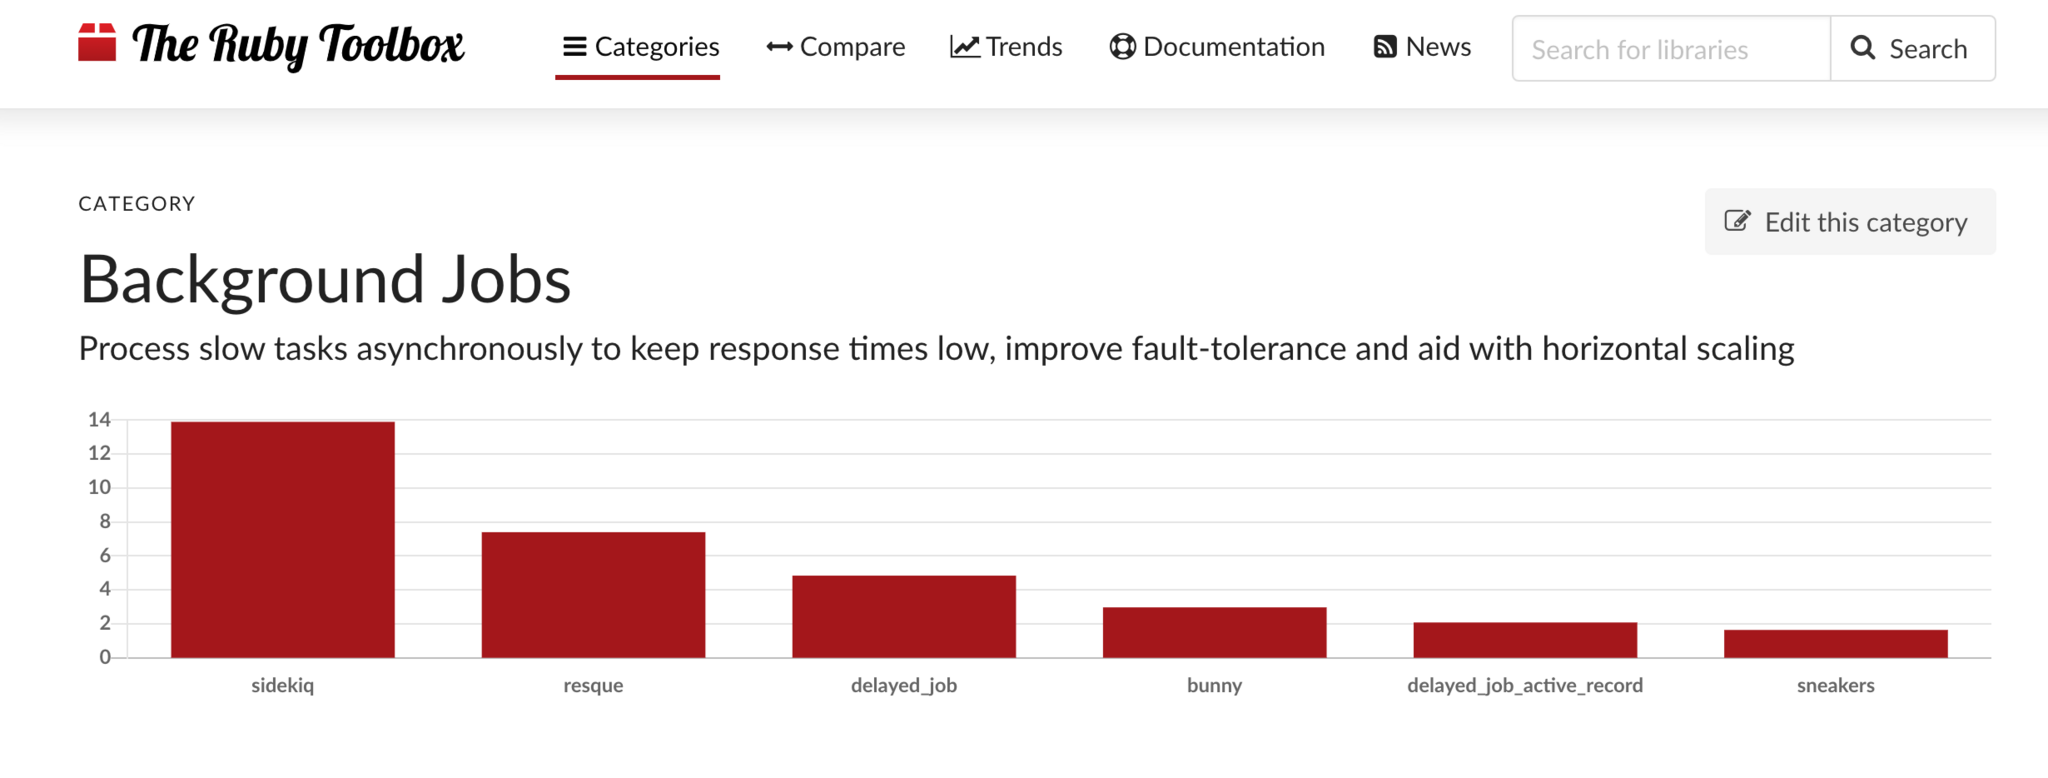
Action Mailer 底層使用的 Active Job 來 queue jobs (這裡是產生寄信動作的 job ),預設使用 in-process queuing system (rails server 重啟,一堆 queue 的 jobs 就消失了,信自然也就不會有寄出的動作了)
-
其他比較知名的選擇
- 使用 Redis 存資料
- Sidekiq
- Resque (DHH 似乎 prefer 這個,影片只有提到這個)
- 使用 Database (獨立一個 table 存放資料),最單純
- Delayed Job
- 使用 Redis 存資料
Hotwire / Turbo Frames / Turbo Streams(append) / Stimulus
參考 Hotwire: The Demo: https://www.youtube.com/watch?v=eKY-QES1XQQ
Turbo Frames - DHH Rails 7 Demo 沒有提到的部分
# app/views/posts/show.html.erb
+  <%= turbo_frame_tag "post" do %>
  <p style="color: green"><%= notice %></p>

  <%= render @post %>
-  <%= render "posts/comments", post: @post %>
  <div>
    <%= link_to "Edit this post", edit_post_path(@post) %> |
-    <%= link_to "Back to posts", posts_path %>
+    <%= link_to "Back to posts", posts_path, 'data-turbo-frame': "_top" %>

    <%= button_to "Destroy this post", @post, method: :delete %>
  </div>
+  <% end %>
+  <%= render "posts/comments", post: @post %>
# app/views/posts/edit.html.erb
  <h1>Editing post</h1>
+  <%= turbo_frame_tag "post" do %>
  <%= render "form", post: @post %>
+  <% end %>

  <br>

  <div>
    <%= link_to "Show this post", @post %> |
    <%= link_to "Back to posts", posts_path %>
  </div>
- 在show post 跟 edit post 之間,加入 turbo_frame_tag
/* cat app/assets/stylesheets/turbo_frame.css */
turbo-frame {
  display: block;
  border: 1px solid green;
}
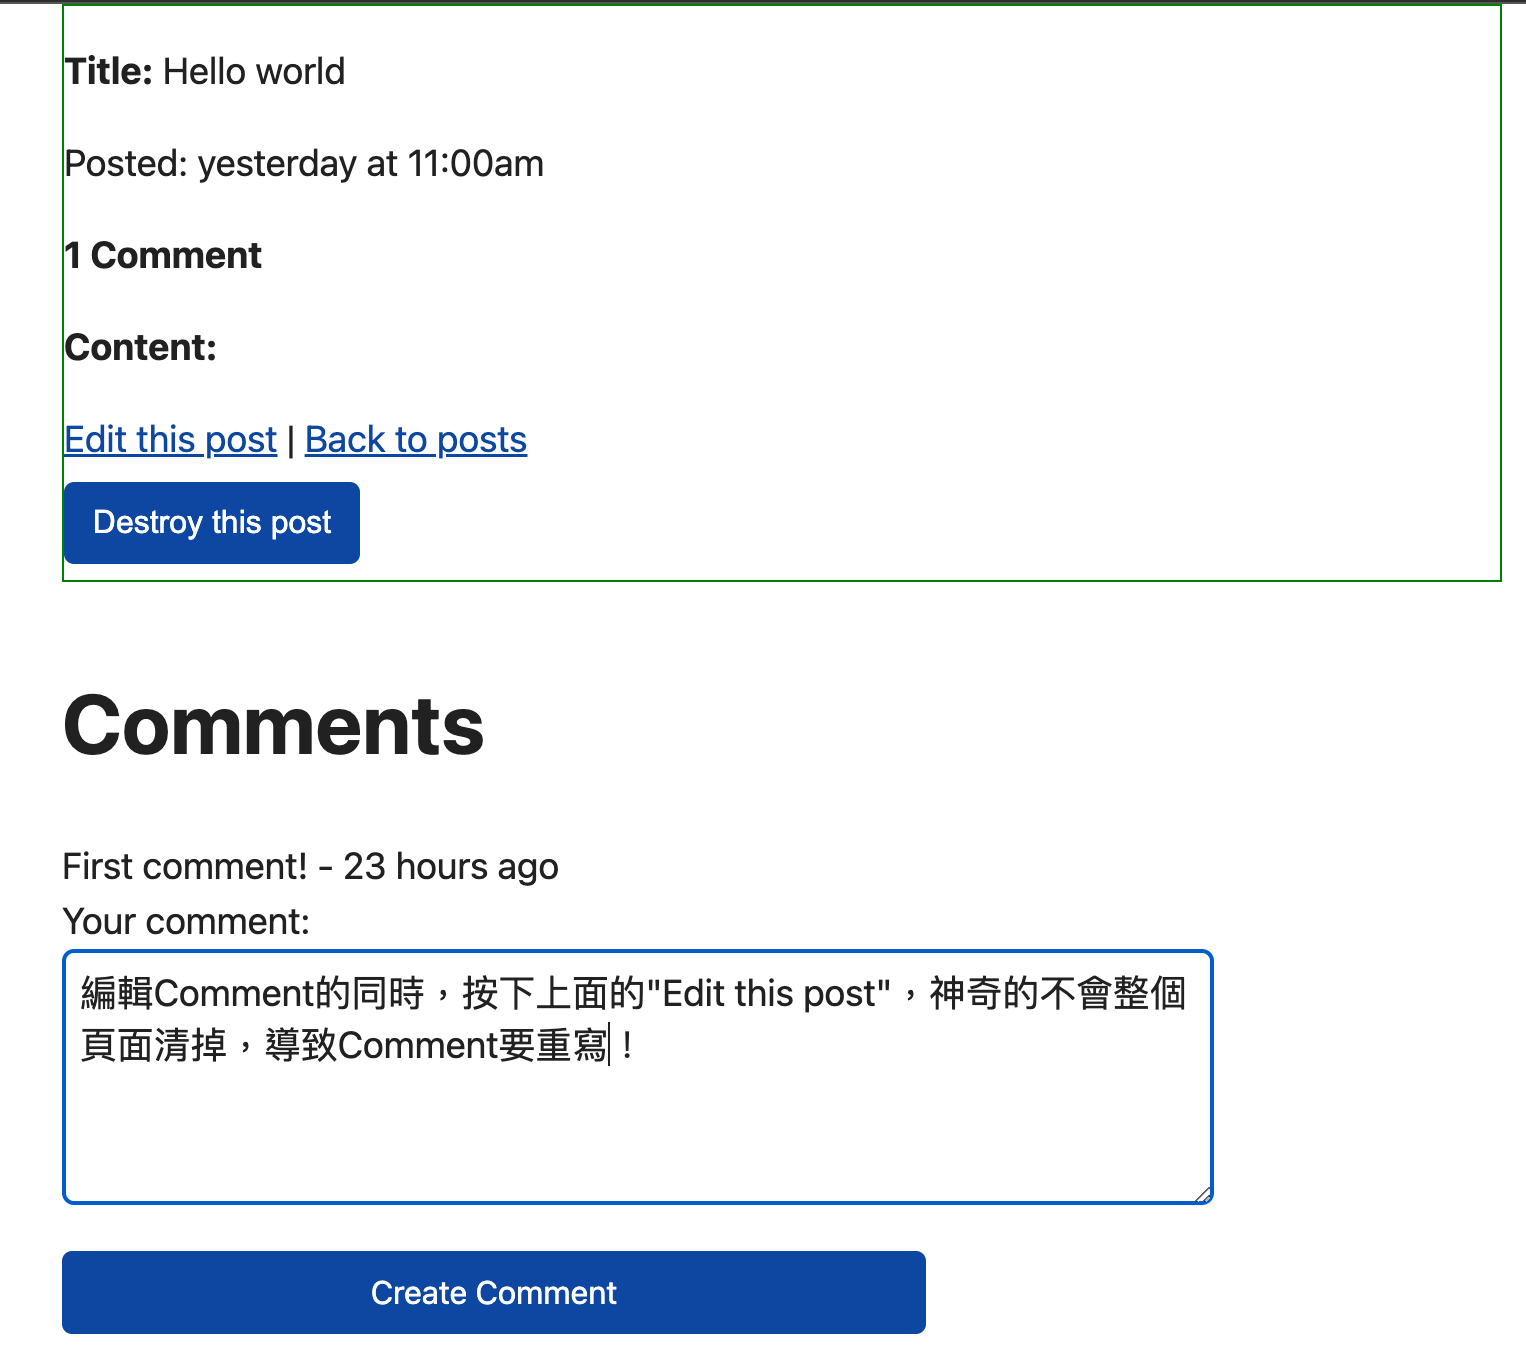
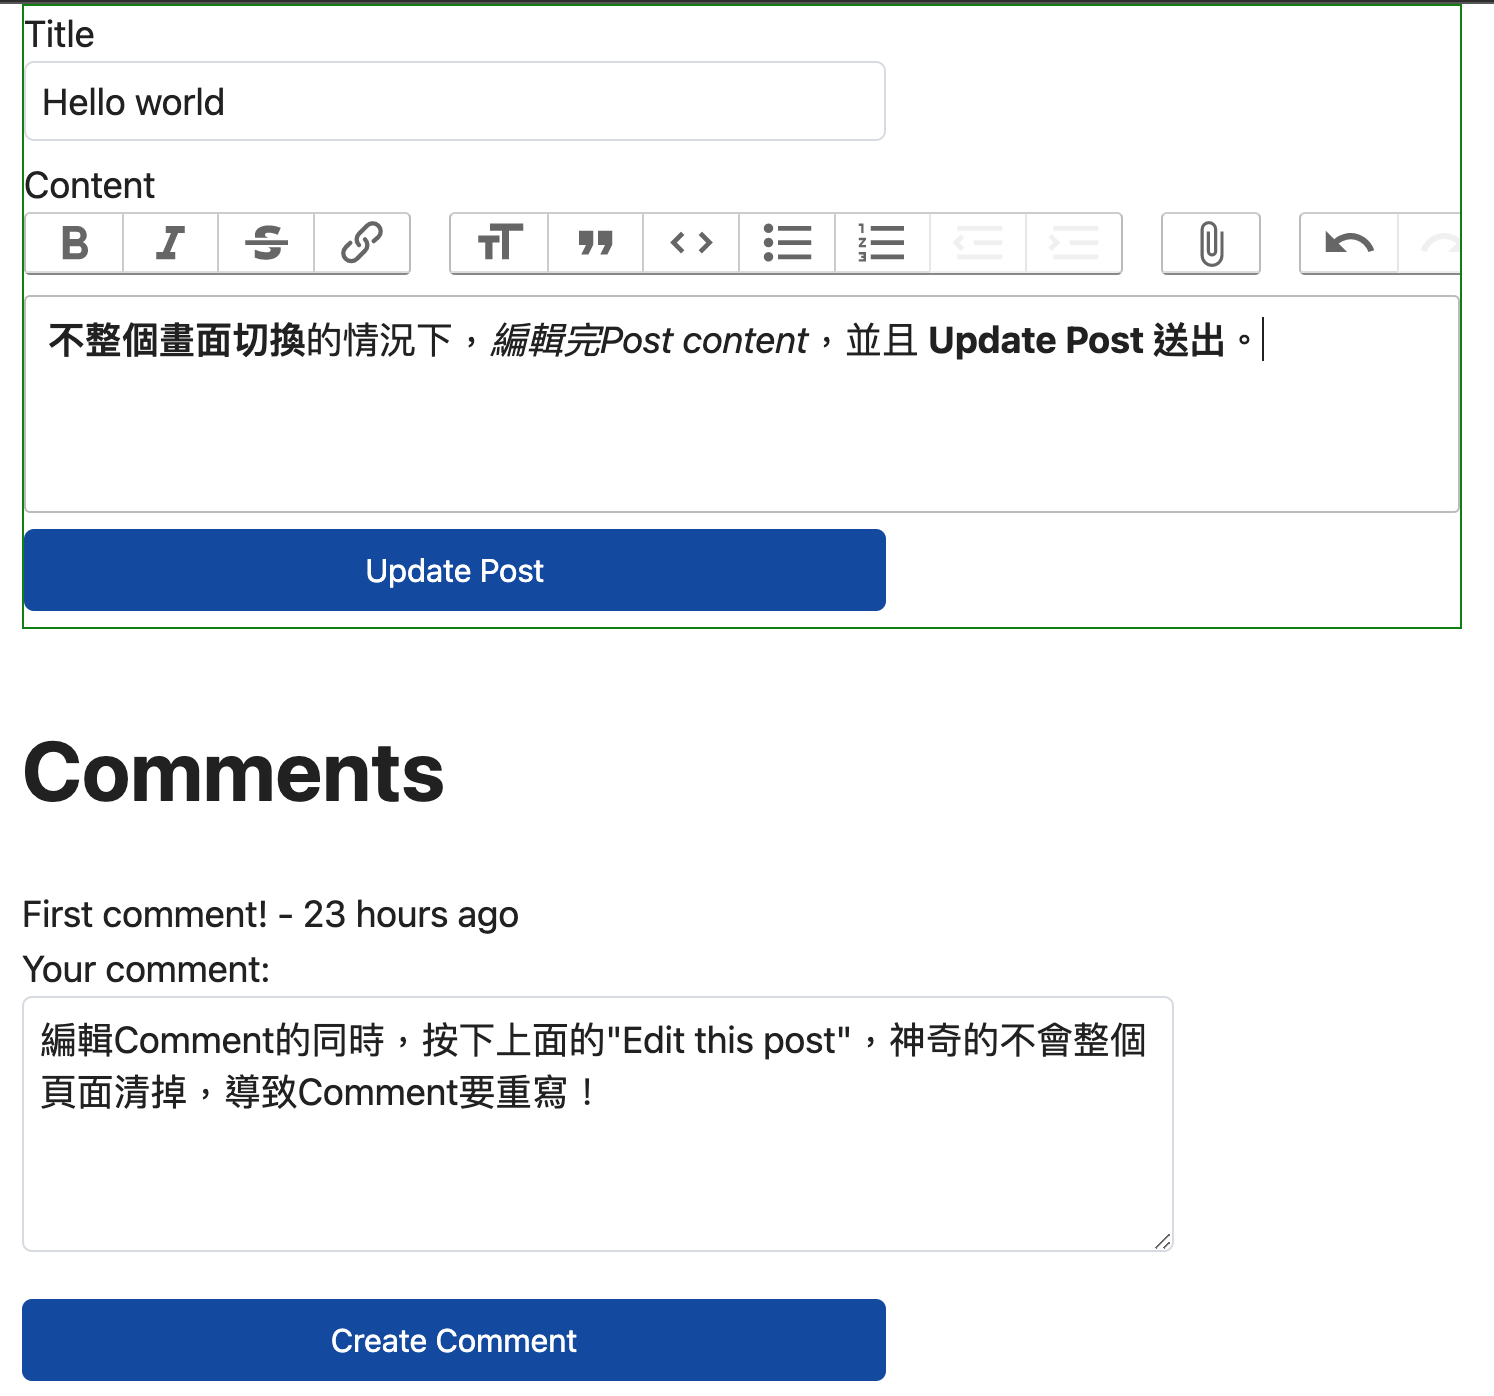
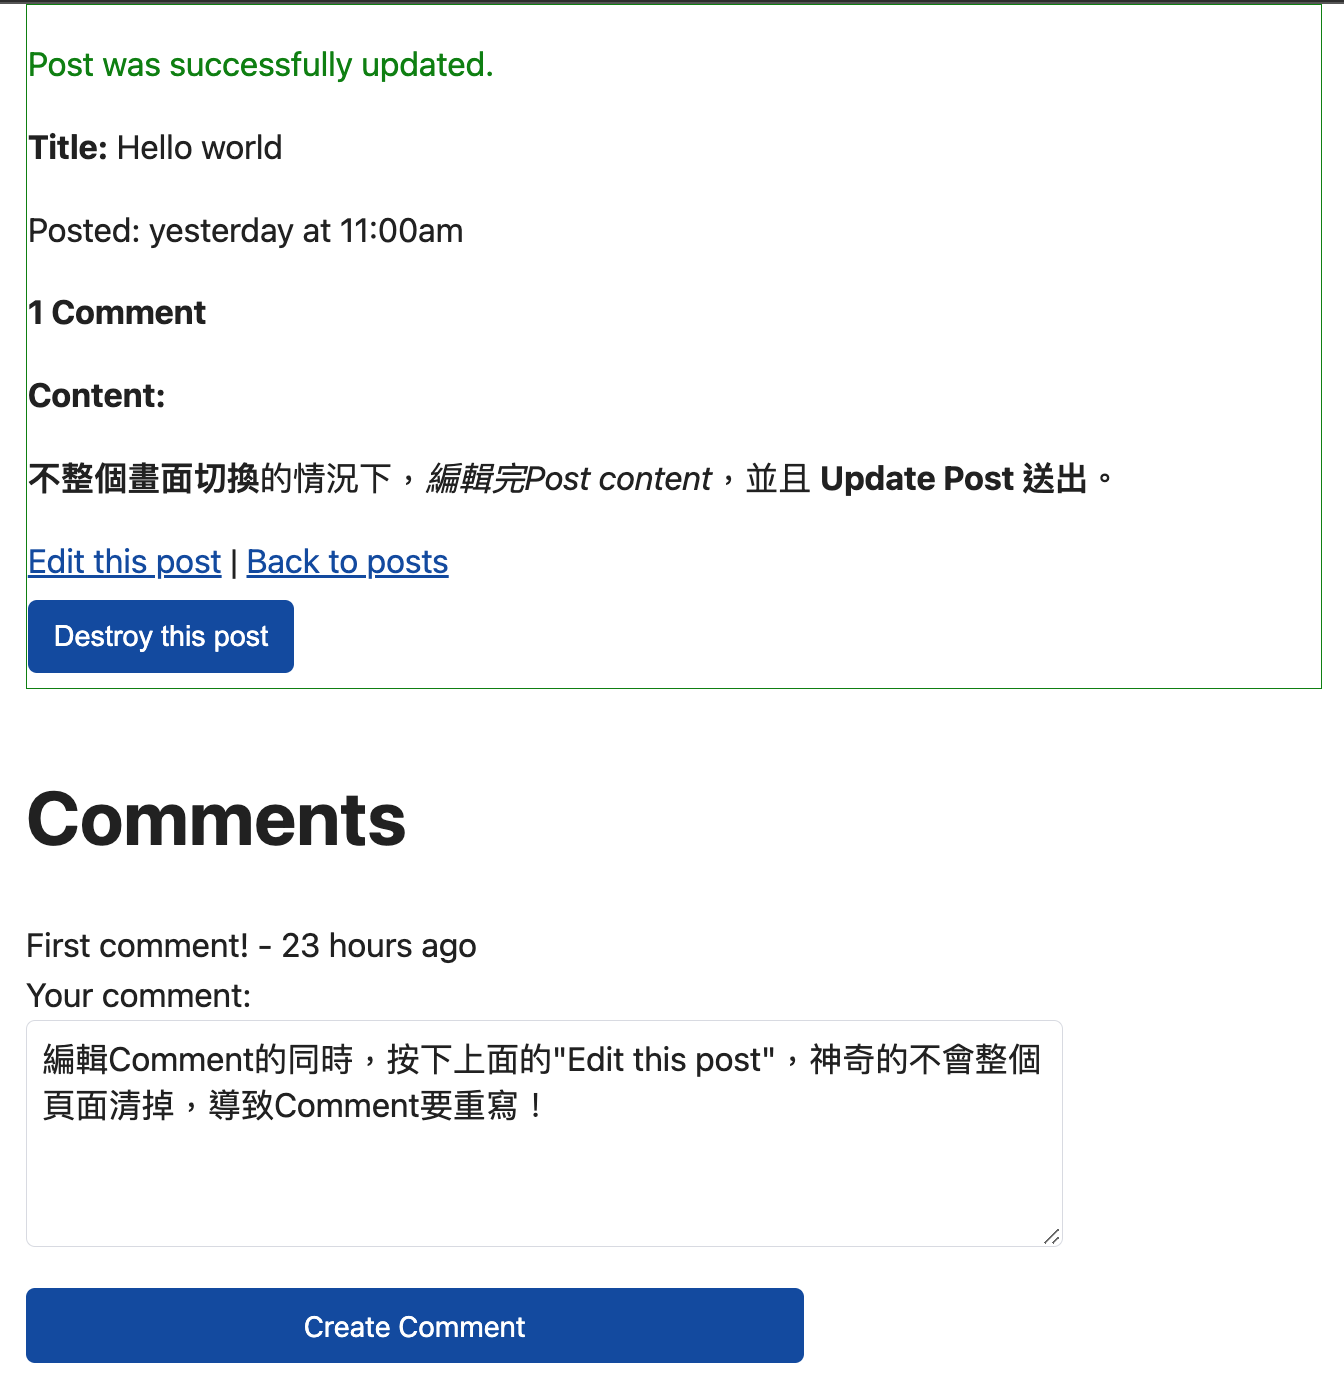
調整一下 css 讓,turbo_frame 加入框架,更方便觀察,哪一個區塊,是 ajax 切換的。
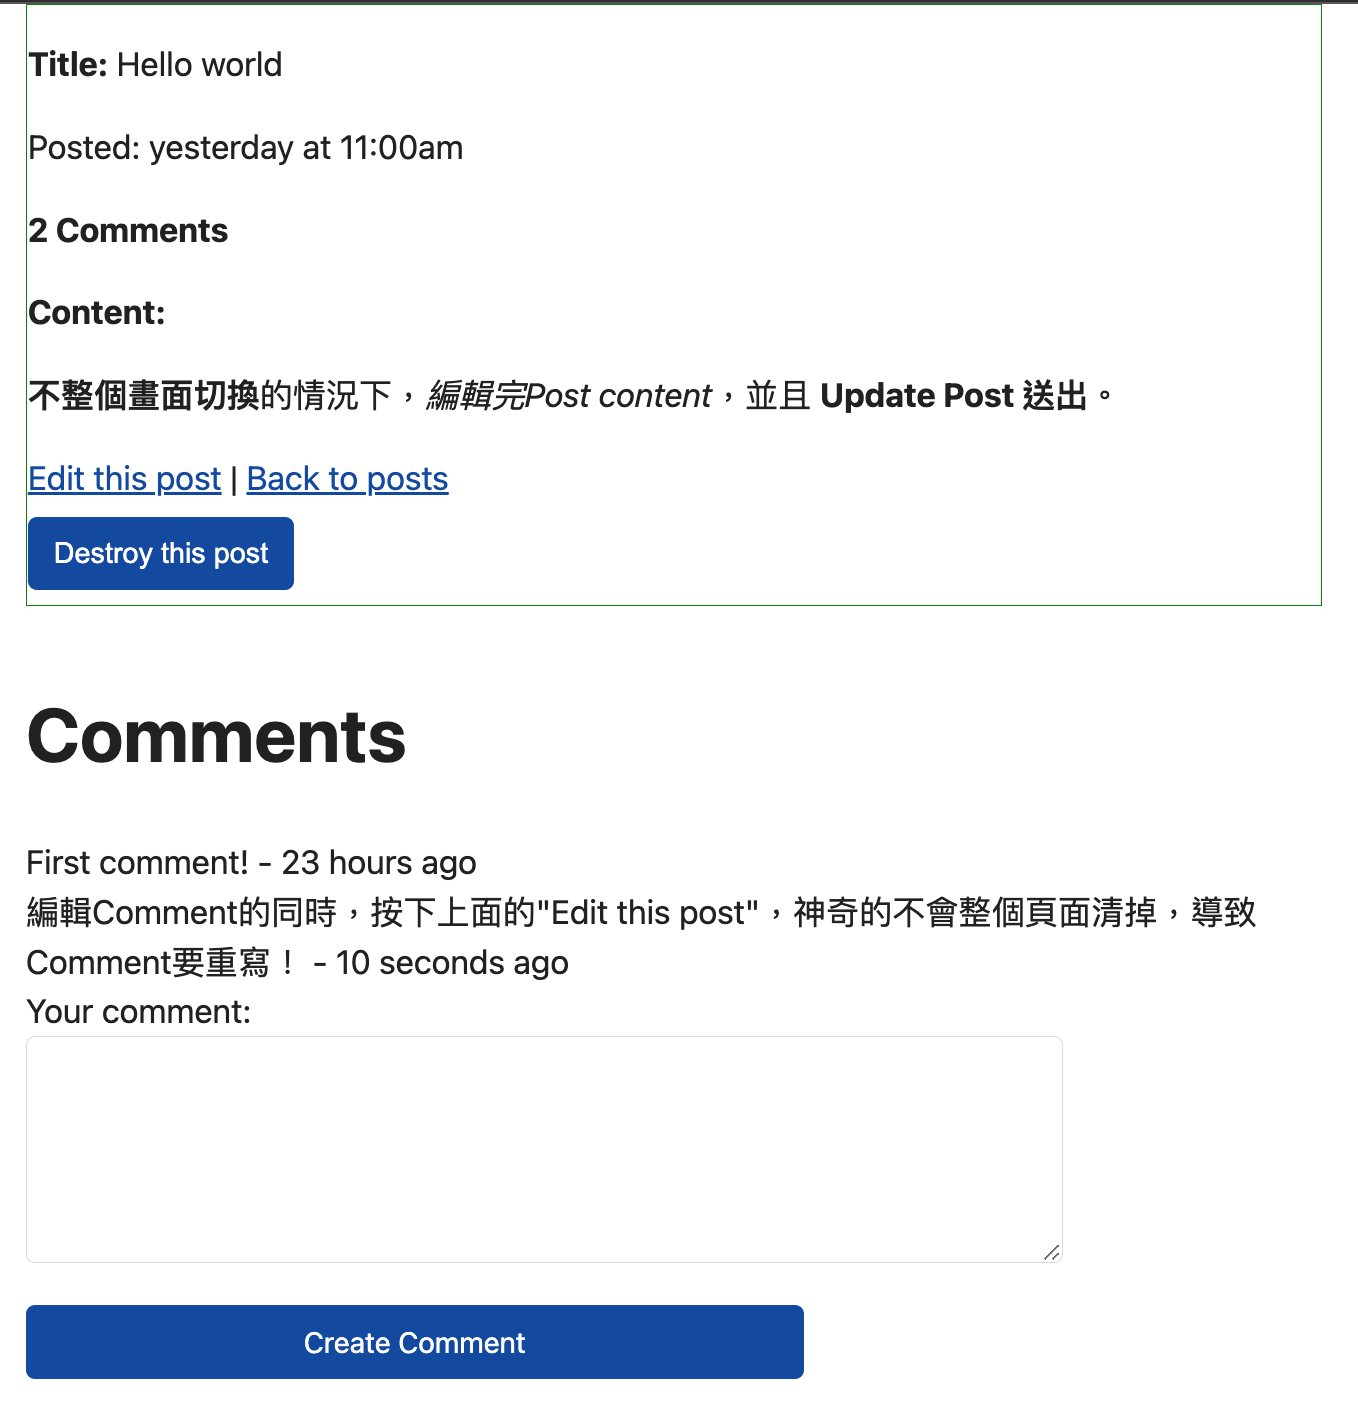
瀏覽器 http://localhost:3000/posts/show 看看,在你 一邊編輯comment 的同時,也可以修改 Post 內容 是不是,很像 SPA,又不用另外多寫 Javascript 去達到這個效果!
Turbo Frames / Turbo Streams - DHH Rails 7 Demo 沒有提到的部分 (二)
讓 Comments 也能跟Post一樣,按下 Submit 不會整個頁面切換,
方法一 Turbo Frames
# app/views/posts/show.html.erb
  <%= turbo_frame_tag "post" do %>
  <p style="color: green"><%= notice %></p>

  <%= render @post %>

  <div>
    <%= link_to "Edit this post", edit_post_path(@post) %> |
    <%= link_to "Back to posts", posts_path, 'data-turbo-frame': "_top" %>

    <%= button_to "Destroy this post", @post, method: :delete %>
  </div>
  <% end %>
+  <%= turbo_frame_tag "p_comments" do %>
  <%= render "posts/comments", post: @post %>
+  <% end %>
# app/views/posts/_comments.html.erb
  <h2>Comments</h2>

  <div id="comments">
    <%# Expands to render partial: "comments/comment", collection: post.comments %>
    <%= render post.comments %>
  </div>

+  <%= turbo_frame_tag "p_comments" do %>
  <%= render "comments/new", post: post %>
+  <% end %>
- 加好 turbo_frame_tag 之後就可以試試看了
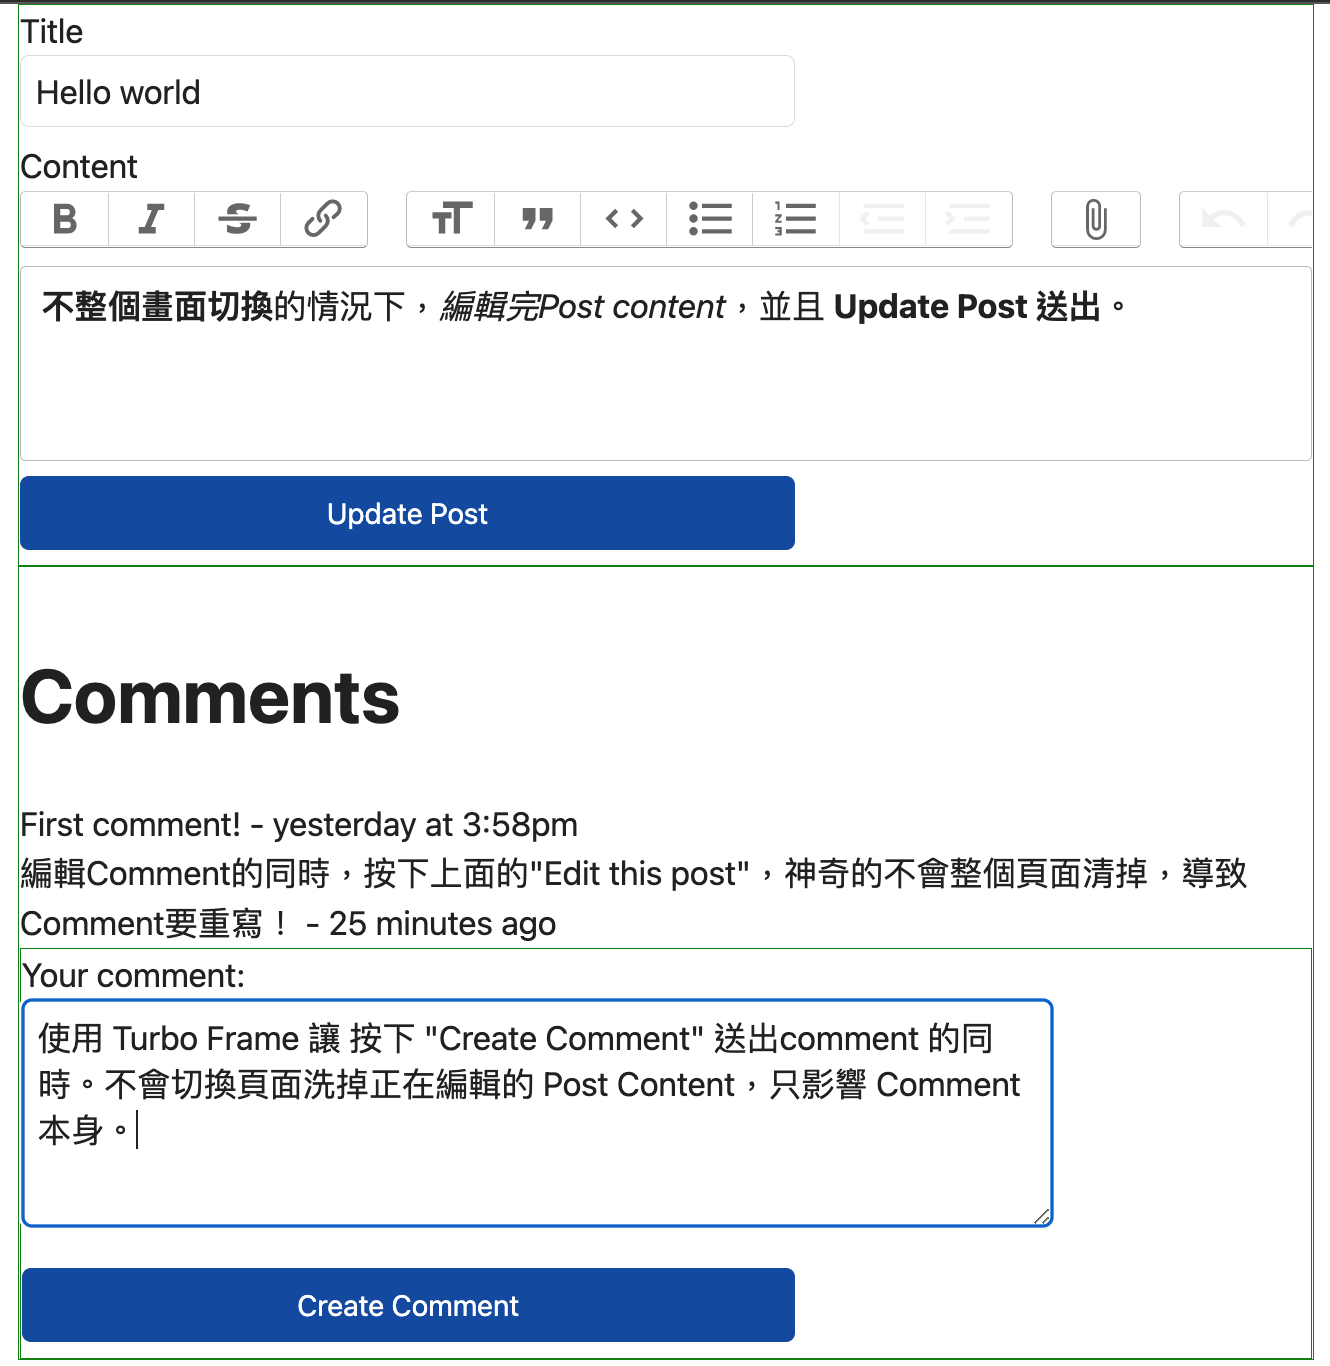
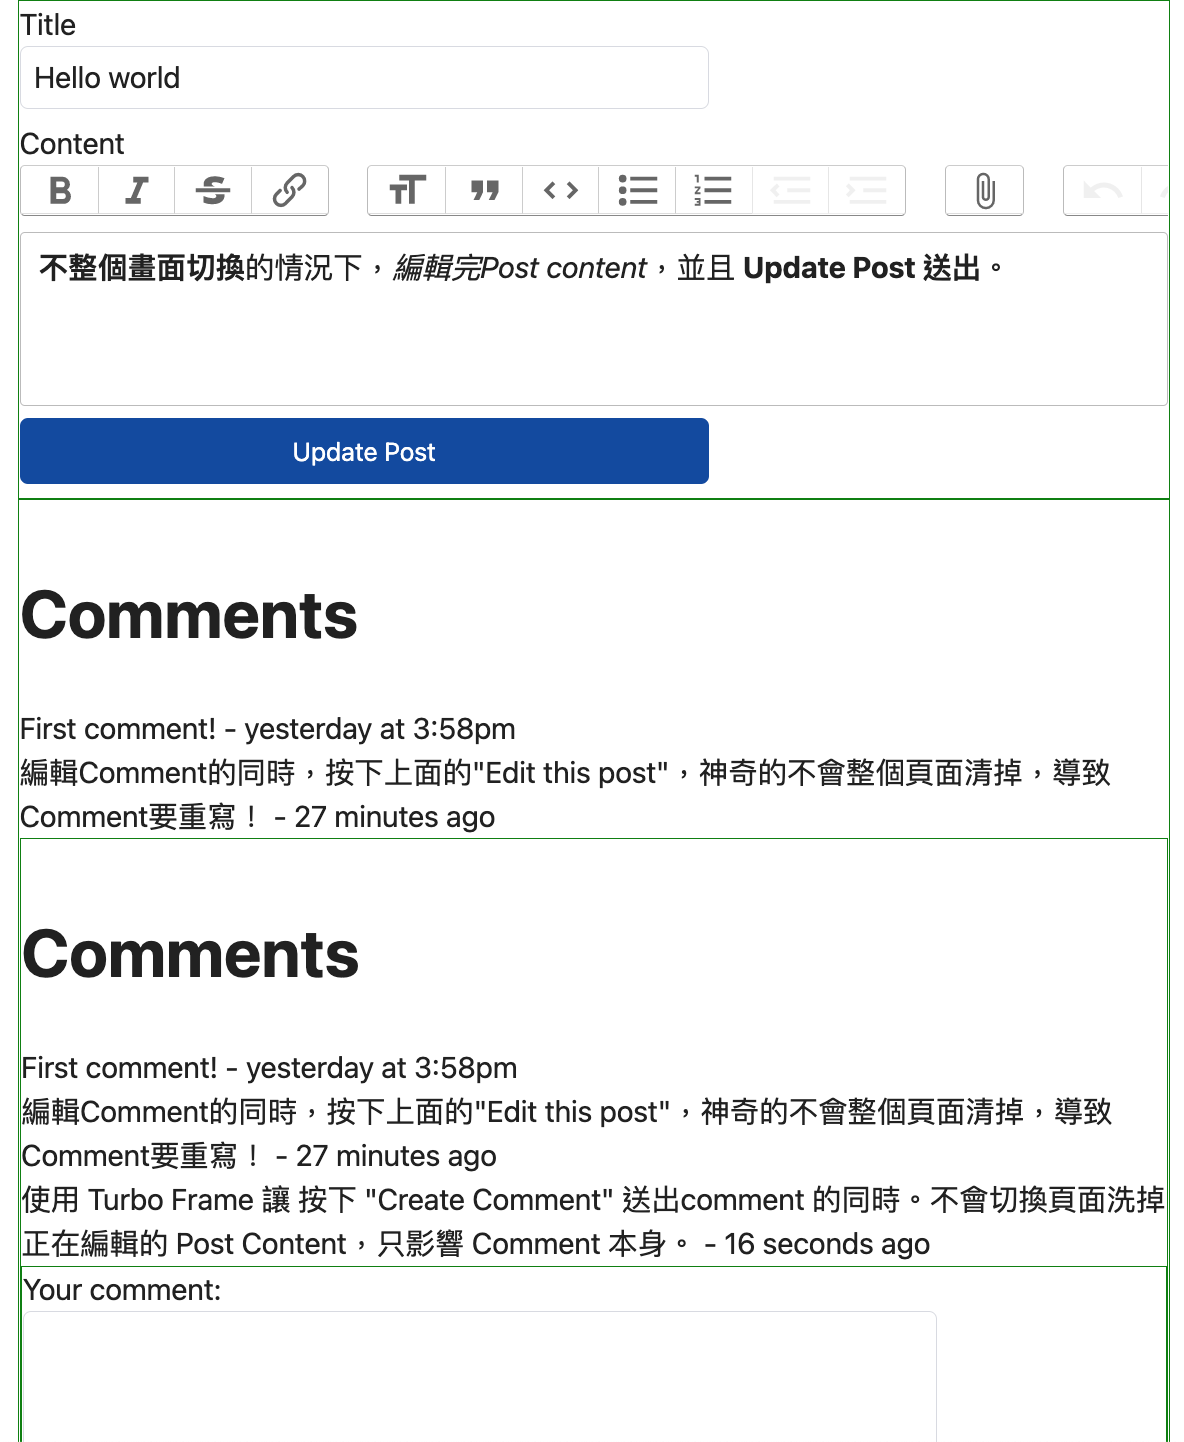
方法二 Turbo Streams (append)
這感覺很像 Rails (form remote: true) 早期的 "SJR (Server-generated JavaScript Responses)"
記得先把 *方法一** 針對 comments 的 turbo_frame_tag 還原*
# app/views/comments/create.turbo_stream.erb
<%= turbo_stream.append "comments", @comment %>
- 如果是 SJR 時代,檔名就會是 create.js.erb 搭配 form remote: true
- turbo_stream.append
"comments", @comment,這個 comments 是對應到 app/views/posts/_comments.html.erb 的<div id="comments">的 id: comments
# app/controllers/comments_controller.rb
class CommentsController < ApplicationController
  before_action :set_post

  def create
    # @post.comments.create! params.required(:comment).permit(:content)
    @comment = @post.comments.create! params.required(:comment).permit(:content)
    # CommentsMailer.submitted(comment).deliver_later
    # redirect_to @post
    respond_to do |format|
      format.turbo_stream
      format.html { redirect_to @post }
    end
  end

  private
  def set_post
    @post = Post.find(params[:post_id])
  end
end
- 這時候,可以發現,新增 Comments 也不會重刷頁面,但會一直comments 會一直往後 append,從此,post , comment , 都可以像是 SPA 一樣操作
## Stimulus - DHH Rails 7 Demo 沒有提到的部分
但是使用 turbo_stream.append 送新的 comment 輸入欄位會一直都會保留上次的輸入內容,使用 Stimulus 把它清空
// app/javascript/controllers/reset_form_controller.js
import { Controller } from "@hotwired/stimulus"

export default class extends Controller {
  reset() {
    this.element.reset()
  }
}
* app/views/comments/_new.html.erb
-  <%= form_with model: [ post, Comment.new ] do |form| %>
+  <%= form_with model: [ post, Comment.new ],
+          data: { controller: "reset-form", action: "turbo:submit-end->reset-form#reset" } do |form| %>
    Your comment: <br>
    <%= form.text_area :content, size: "20x5" %>
    <%= form.submit %>
  <% end %>
- 使用 importmap-rails 的 stimulus controller
- 不需要在 index.js 裡面 register 他會自動 load 所有的
- 使用 esbuild 的 stimulus controller
- 需要每寫完一個 Stimulus controller 就要執行
./bin/rails stimulus:manifest:update來把新的 controller 註冊到 app/javascript/controllers/index.js
- 需要每寫完一個 Stimulus controller 就要執行
- 寫好 Stimulus controller 後可以看看,是不是 comment 送出後,輸入欄位,會恢復初始空白。
Hotwire / Turbo Streams 即時更新 comments (websocket)
繼續 DHH 的影片,來讓每個正在瀏覽同一則 post 的 user 同步更新 comments (就像是即時更新的聊天室)
# app/views/posts/show.html.erb
+  <%= turbo_stream_from @post %>
  <%= turbo_frame_tag "post" do %>
  <p style="color: green"><%= notice %></p>

  <%= render @post %>

  <div>
    <%= link_to "Edit this post", edit_post_path(@post) %> |
    <%= link_to "Back to posts", posts_path, 'data-turbo-frame': "_top" %>

    <%= button_to "Destroy this post", @post, method: :delete %>
  </div>
  <% end %>
  <%# <%= turbo_frame_tag "p_comments" do %>
  <%= render "posts/comments", post: @post %>
  <%# <% end %>
# app/models/comment.rb
  class Comment < ApplicationRecord
    belongs_to :post
+    broadcasts_to :post
  end
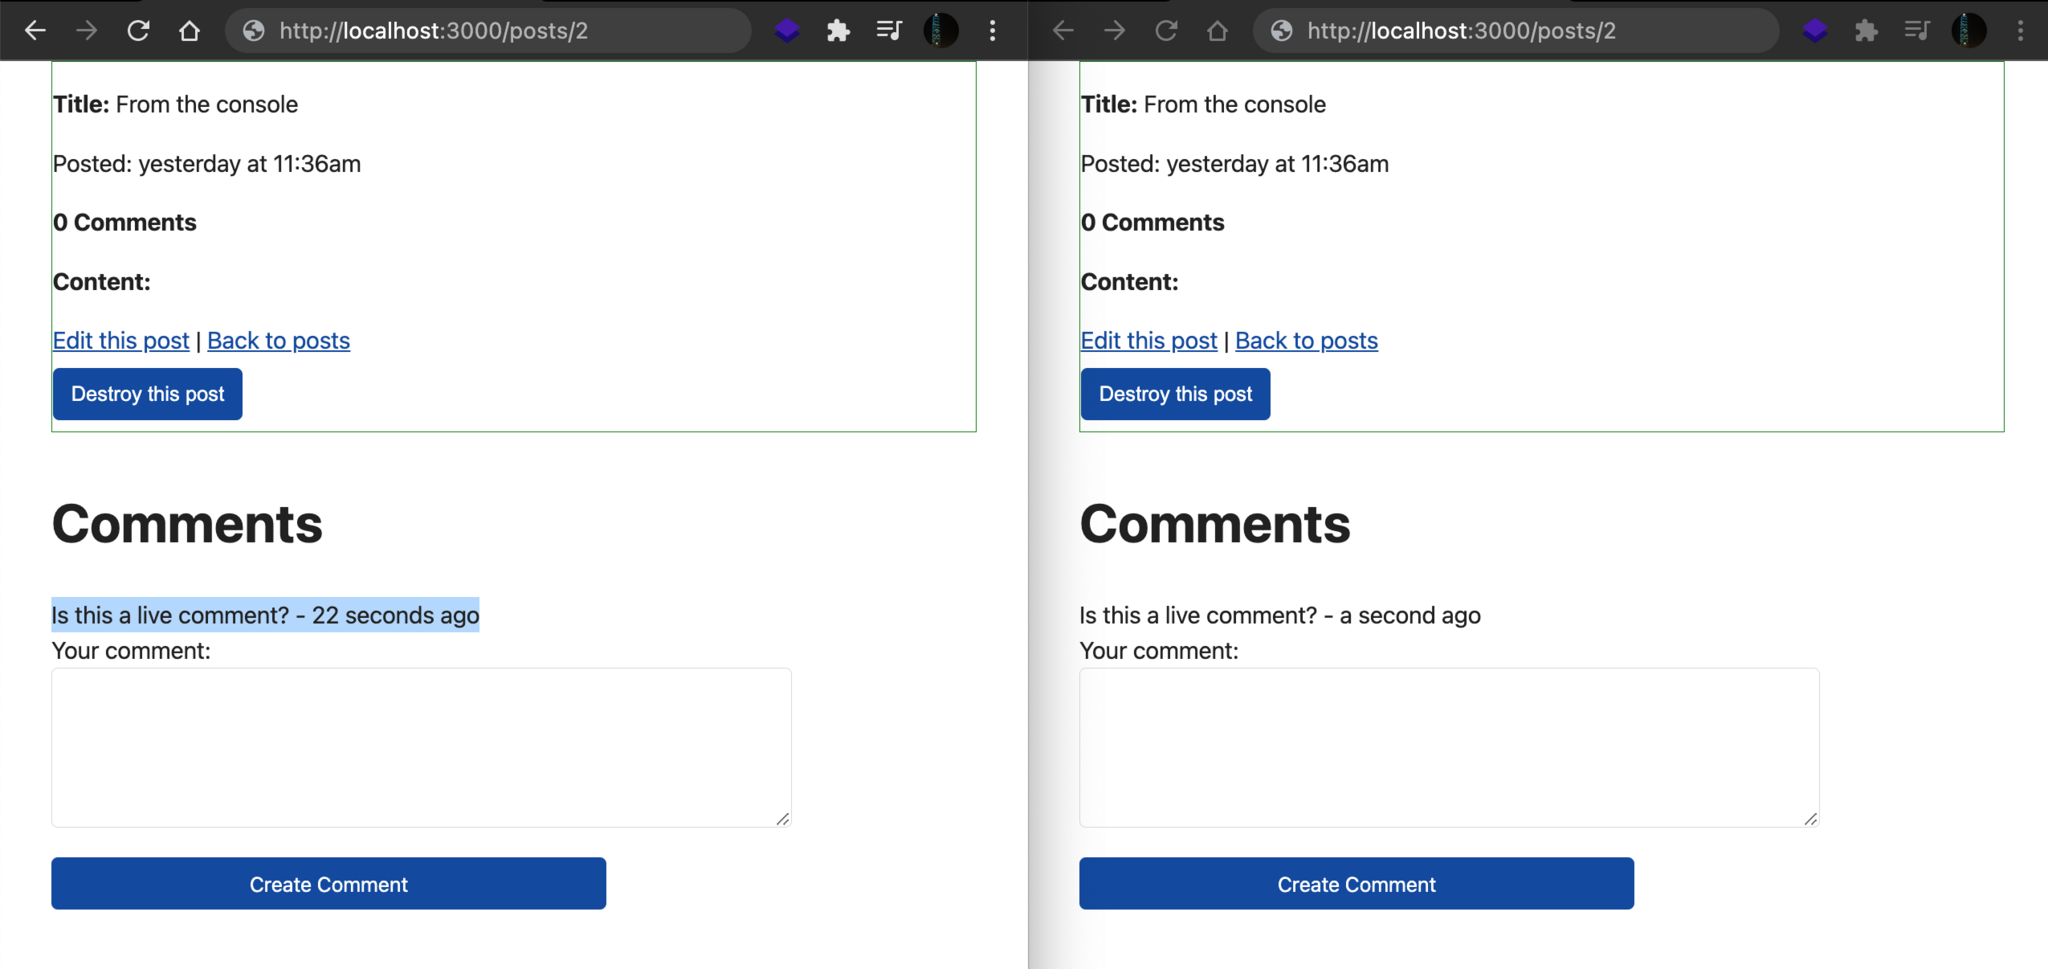
- 到這邊,已經可以 Real time update 同一個 post 的 comments,甚至可以當成一個不同主題的聊天室來使用。
$ rails c
> Post.find(3).comments.last.destroy
> Post.find(3).comments.last.update! content: "HAHA, Just try"
- 用 rails console 刪除 comment 看看,是不是網頁的也會同步更新畫面 (刪除最後一個 comment / 更新最後一個 comment)
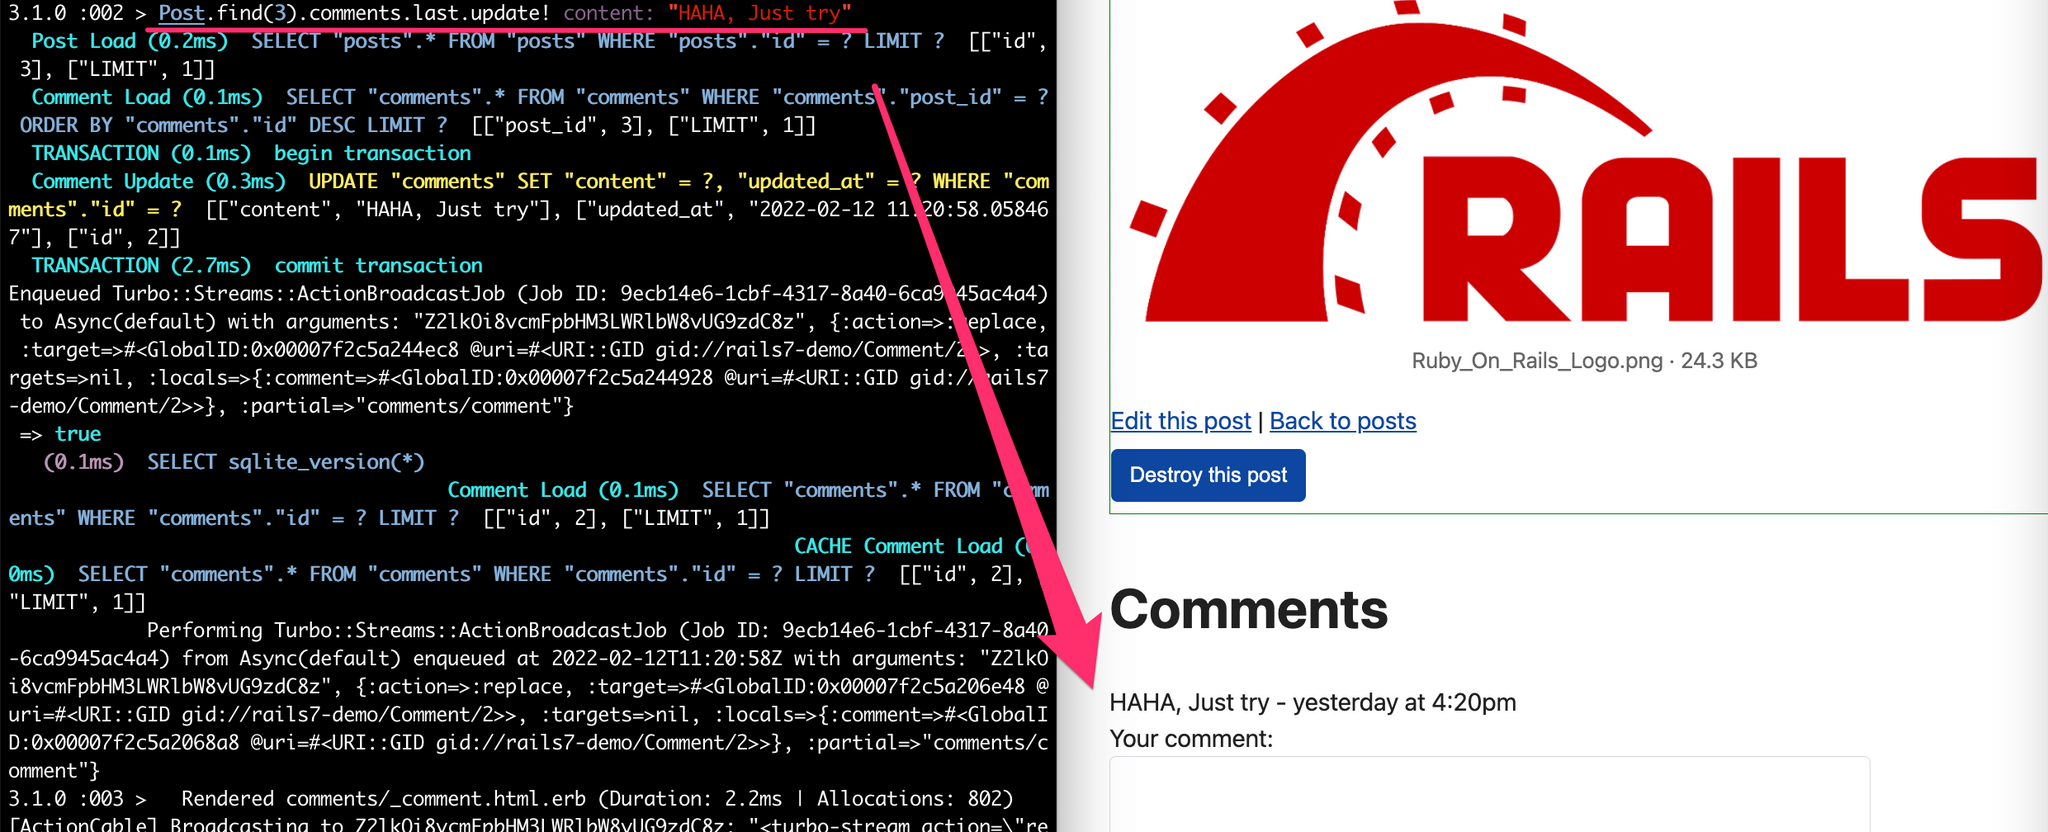
注意: 這邊先要把 Redis 安裝好,並且確定已經啟動。因為 Turbo Streams 使用的 Action Cable 是需要依賴 Redis 來存放資料的。
Rails 寫測試
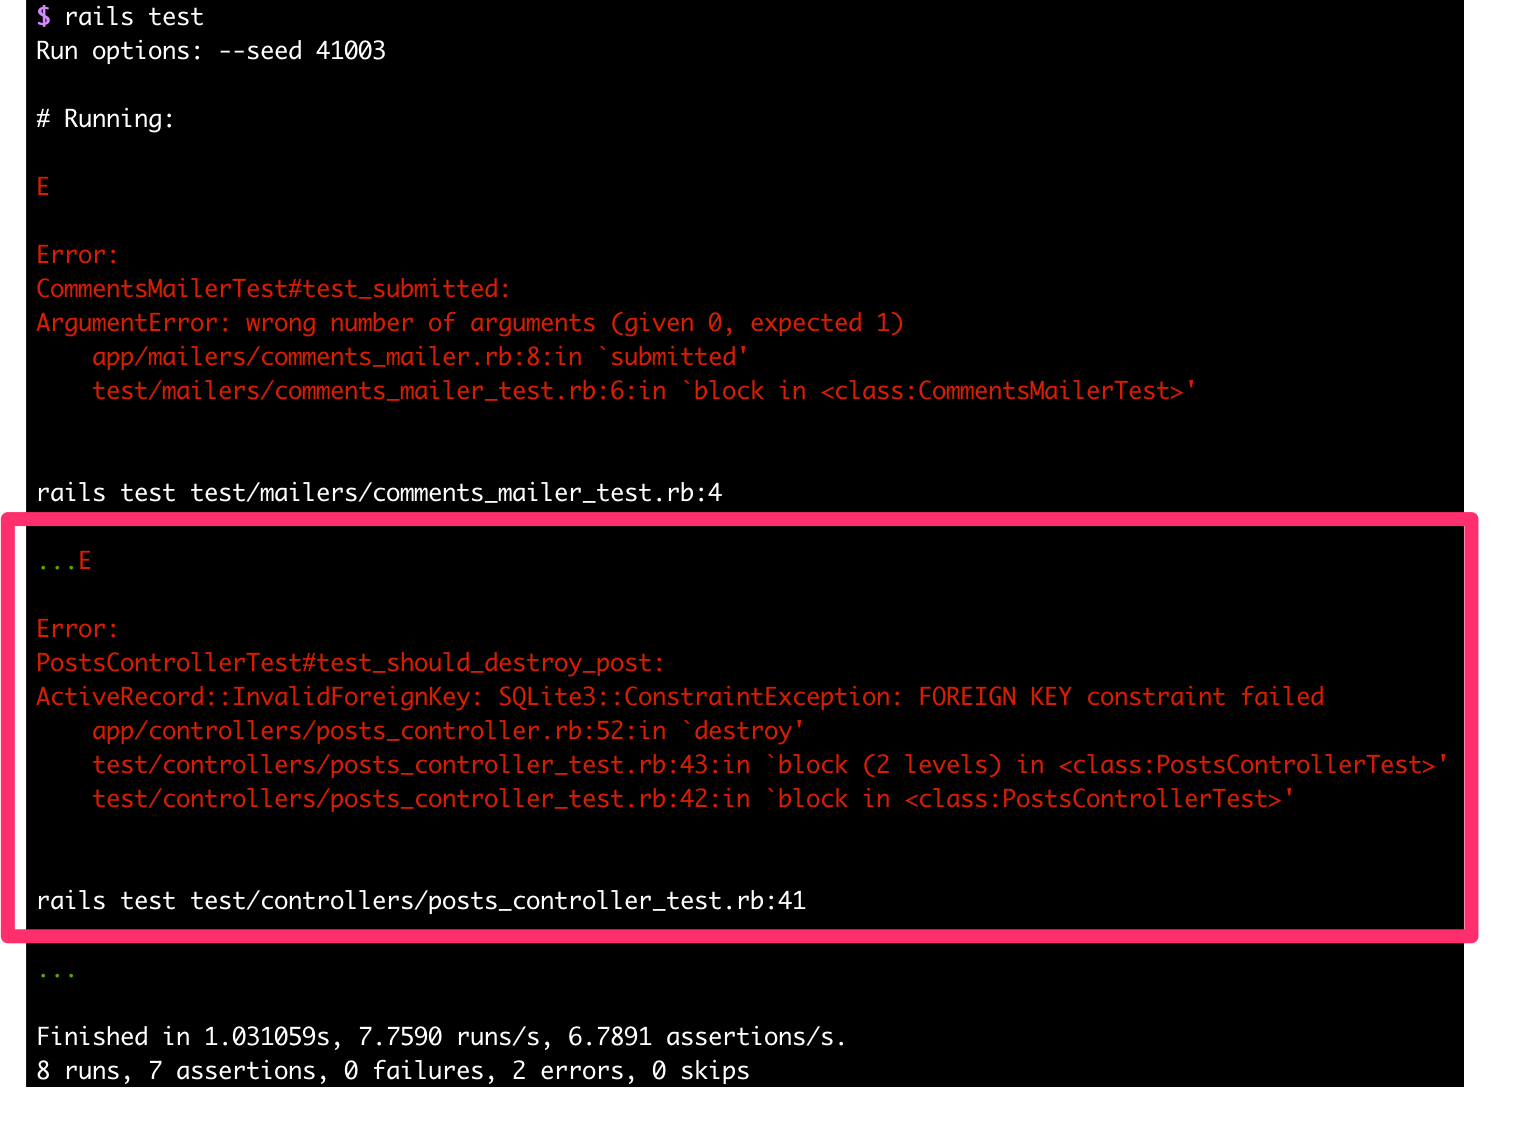
$ rails test
- 這時候,執行測試應該會有很多失敗
# app/models/post.rb
  class Post < ApplicationRecord
    validates_presence_of :title
    has_rich_text :content
-    has_many :comments
+    has_many :comments, dependent: :destroy
  end
- 先解決資料庫關聯錯誤
# test/mailers/comments_mailer_test.rb
  require "test_helper"

  class CommentsMailerTest < ActionMailer::TestCase
    test "submitted" do
-      mail = CommentsMailer.submitted
+      mail = CommentsMailer.submitted comments(:one)
-      assert_equal "Submitted", mail.subject
+      assert_equal "New comment !", mail.subject
-      assert_equal ["to@example.org"], mail.to
+      assert_equal ["blog-owner@example.org"], mail.to
      assert_equal ["from@example.com"], mail.from
-      assert_match "Hi", mail.body.encoded
    end
  end
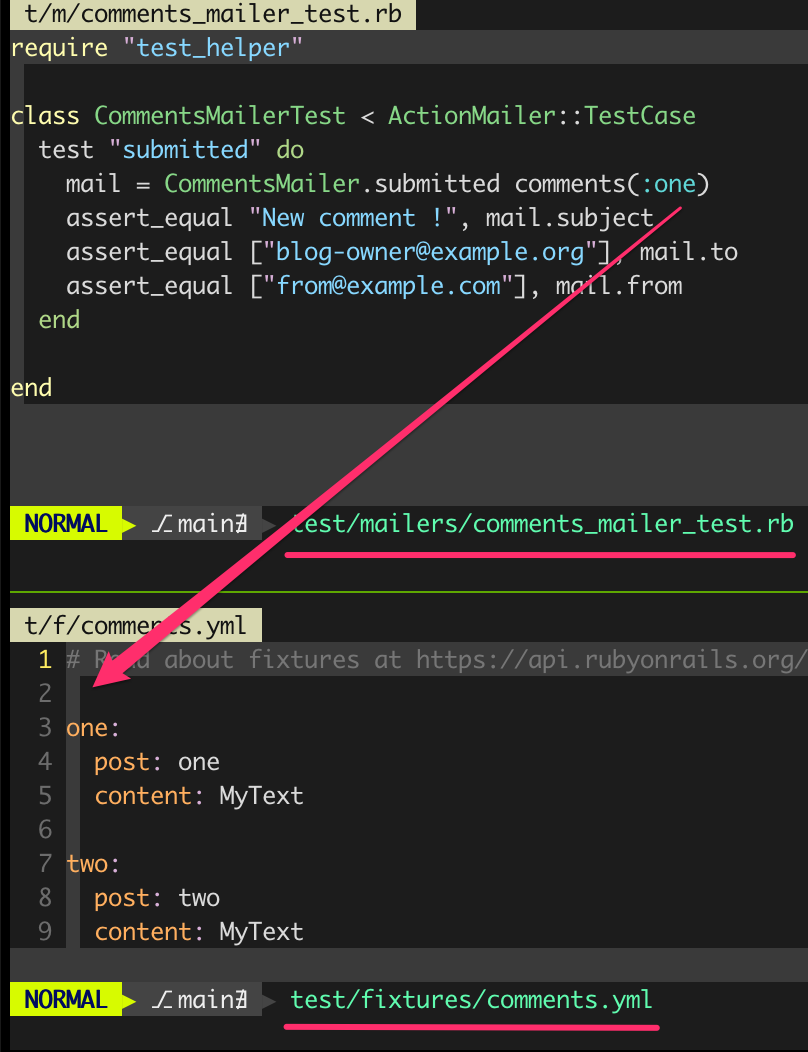
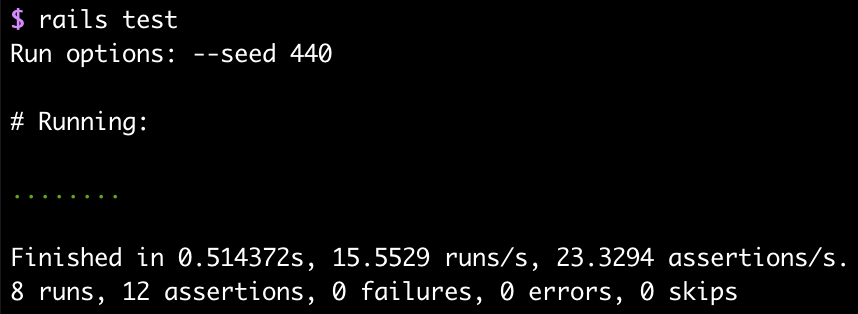
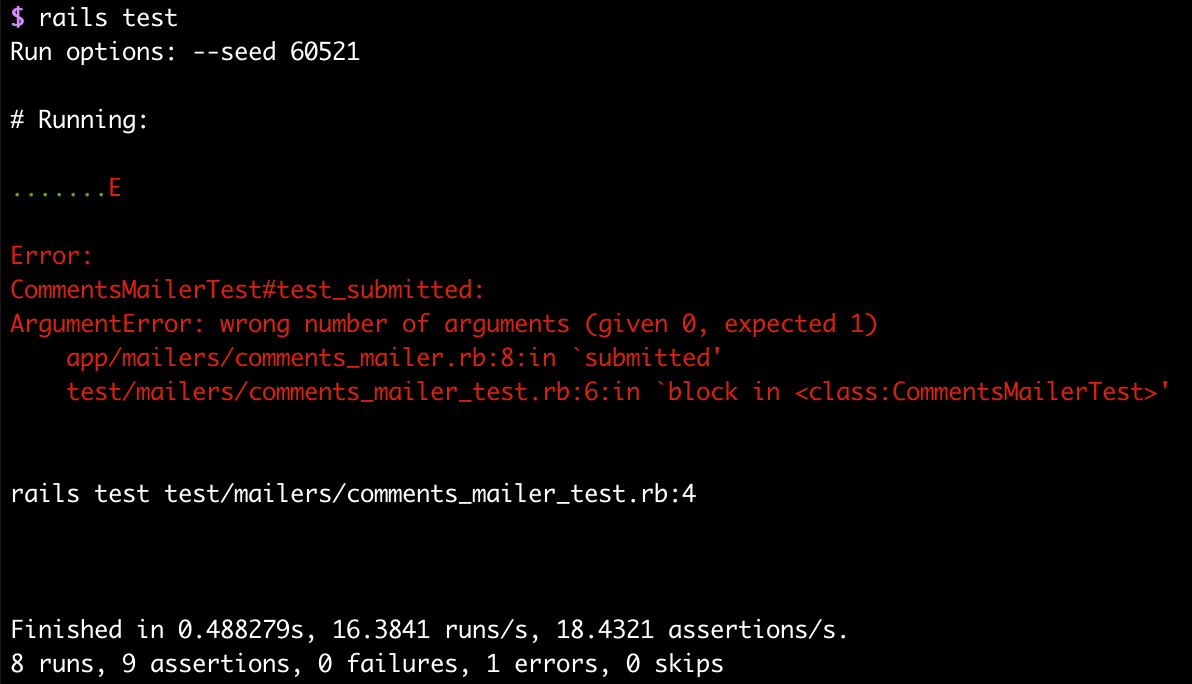
- 解決 comments_mailer_test
- 過程中,可以發現,comments_mailer.rb 如果寫的根 assert 不一樣,會警告
正式環境 資料庫改成 MariaDB (MySQL)
$ rails db:system:change --to=mysql # [postgresql]
$ bundle

- 通常正式環境不是 MySql 就是 PostgreSQL,這邊把 Database 切換成 MySQL
- 開發時,預設不指定,都會用手機APP愛用的單機版資料庫 SQLite
- 開發時,可以就指定好其他資料庫
rails new project -d [ mysql | postgresql ]
$ vim config/database.yml # 設定好使用的 MySQL 資料庫連線資訊
$ rails db:create         # 建立資料庫
$ rails db:migrate        # 建立資料表結構
$ rails server            # 再次起動 rails server
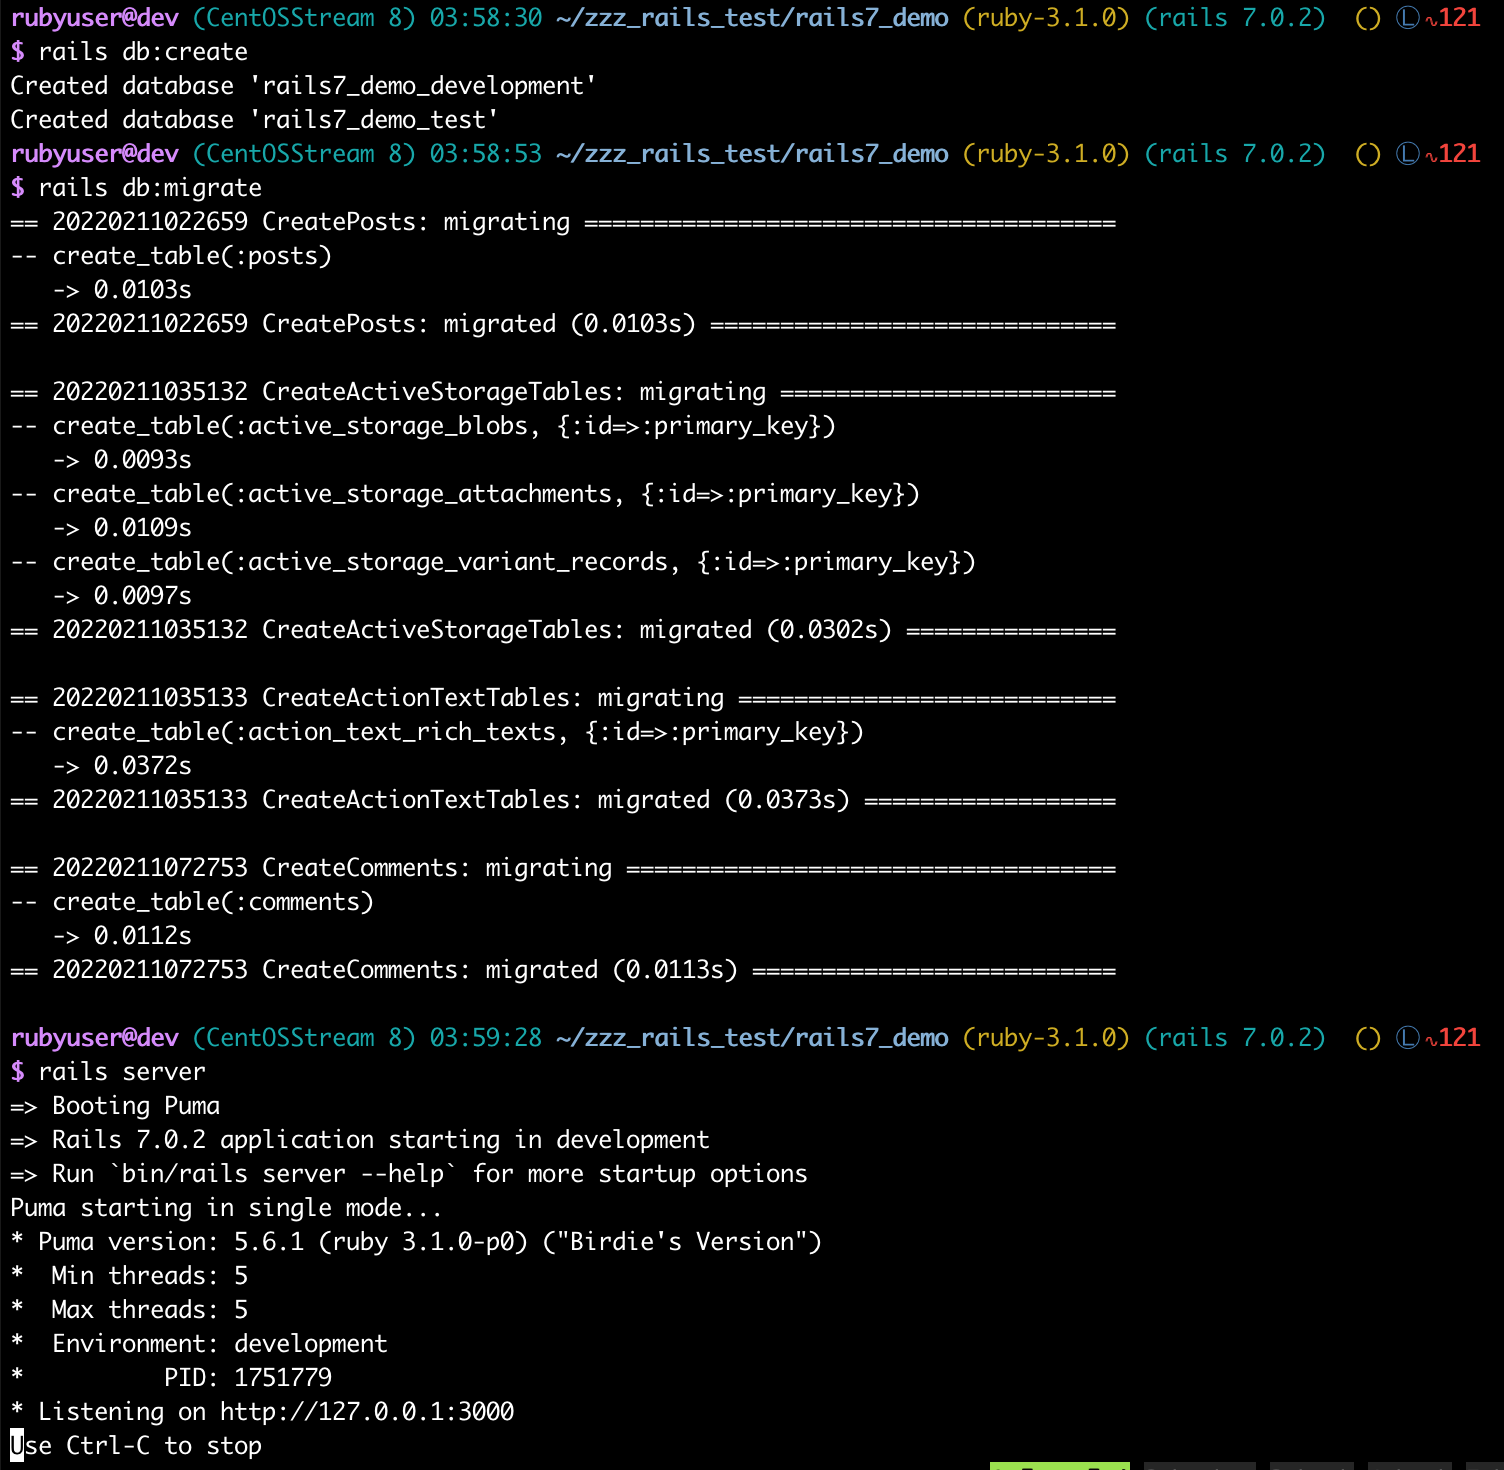
成功:確定沒問題,一樣可以連線,就可以部署到正式環境,如:AWS、GCP、Heroku
後記
-
上面的 Ajax 抽換 Comments 頁面,使用了兩種方法,都不影響 Turbo Streams - Websocket 即時更新畫面,目前理解的差異
-
turbo_frame
- 原理上還是整個頁面 Render 完,在用 Hotwire / Turbo Javascript 框架用瀏覽器抽換畫面,所以還是比較吃效能,當然如果流量不大,應該感覺不出來。
-
turbo_stream.append
- 很明顯,每次都只 Render 單一 Comment content 然後丟回去給瀏覽器,去 append 資料,效能上是會好蠻多才對。
-
turbo_frame
-
用websocket 同步所有人畫面
- model (comment)
broadcasts_to : post #parent_model- 這個應該是用 post 的網址當作訂閱 頻道 pub to redis
- view
turbo_stream_from @post- 這個應該算是訂閱一個頻道 sub from redis
- model (comment)
-
如果是用 esbuild 執行 rails server 方式 預設會使用 gem foreman
$ rails new project -d mysql -j esbuid -c bootstrap
$ vim Procfile.dev
$ bin/dev
其他筆記參考連結: Ruby on Rails 7 特性筆記
